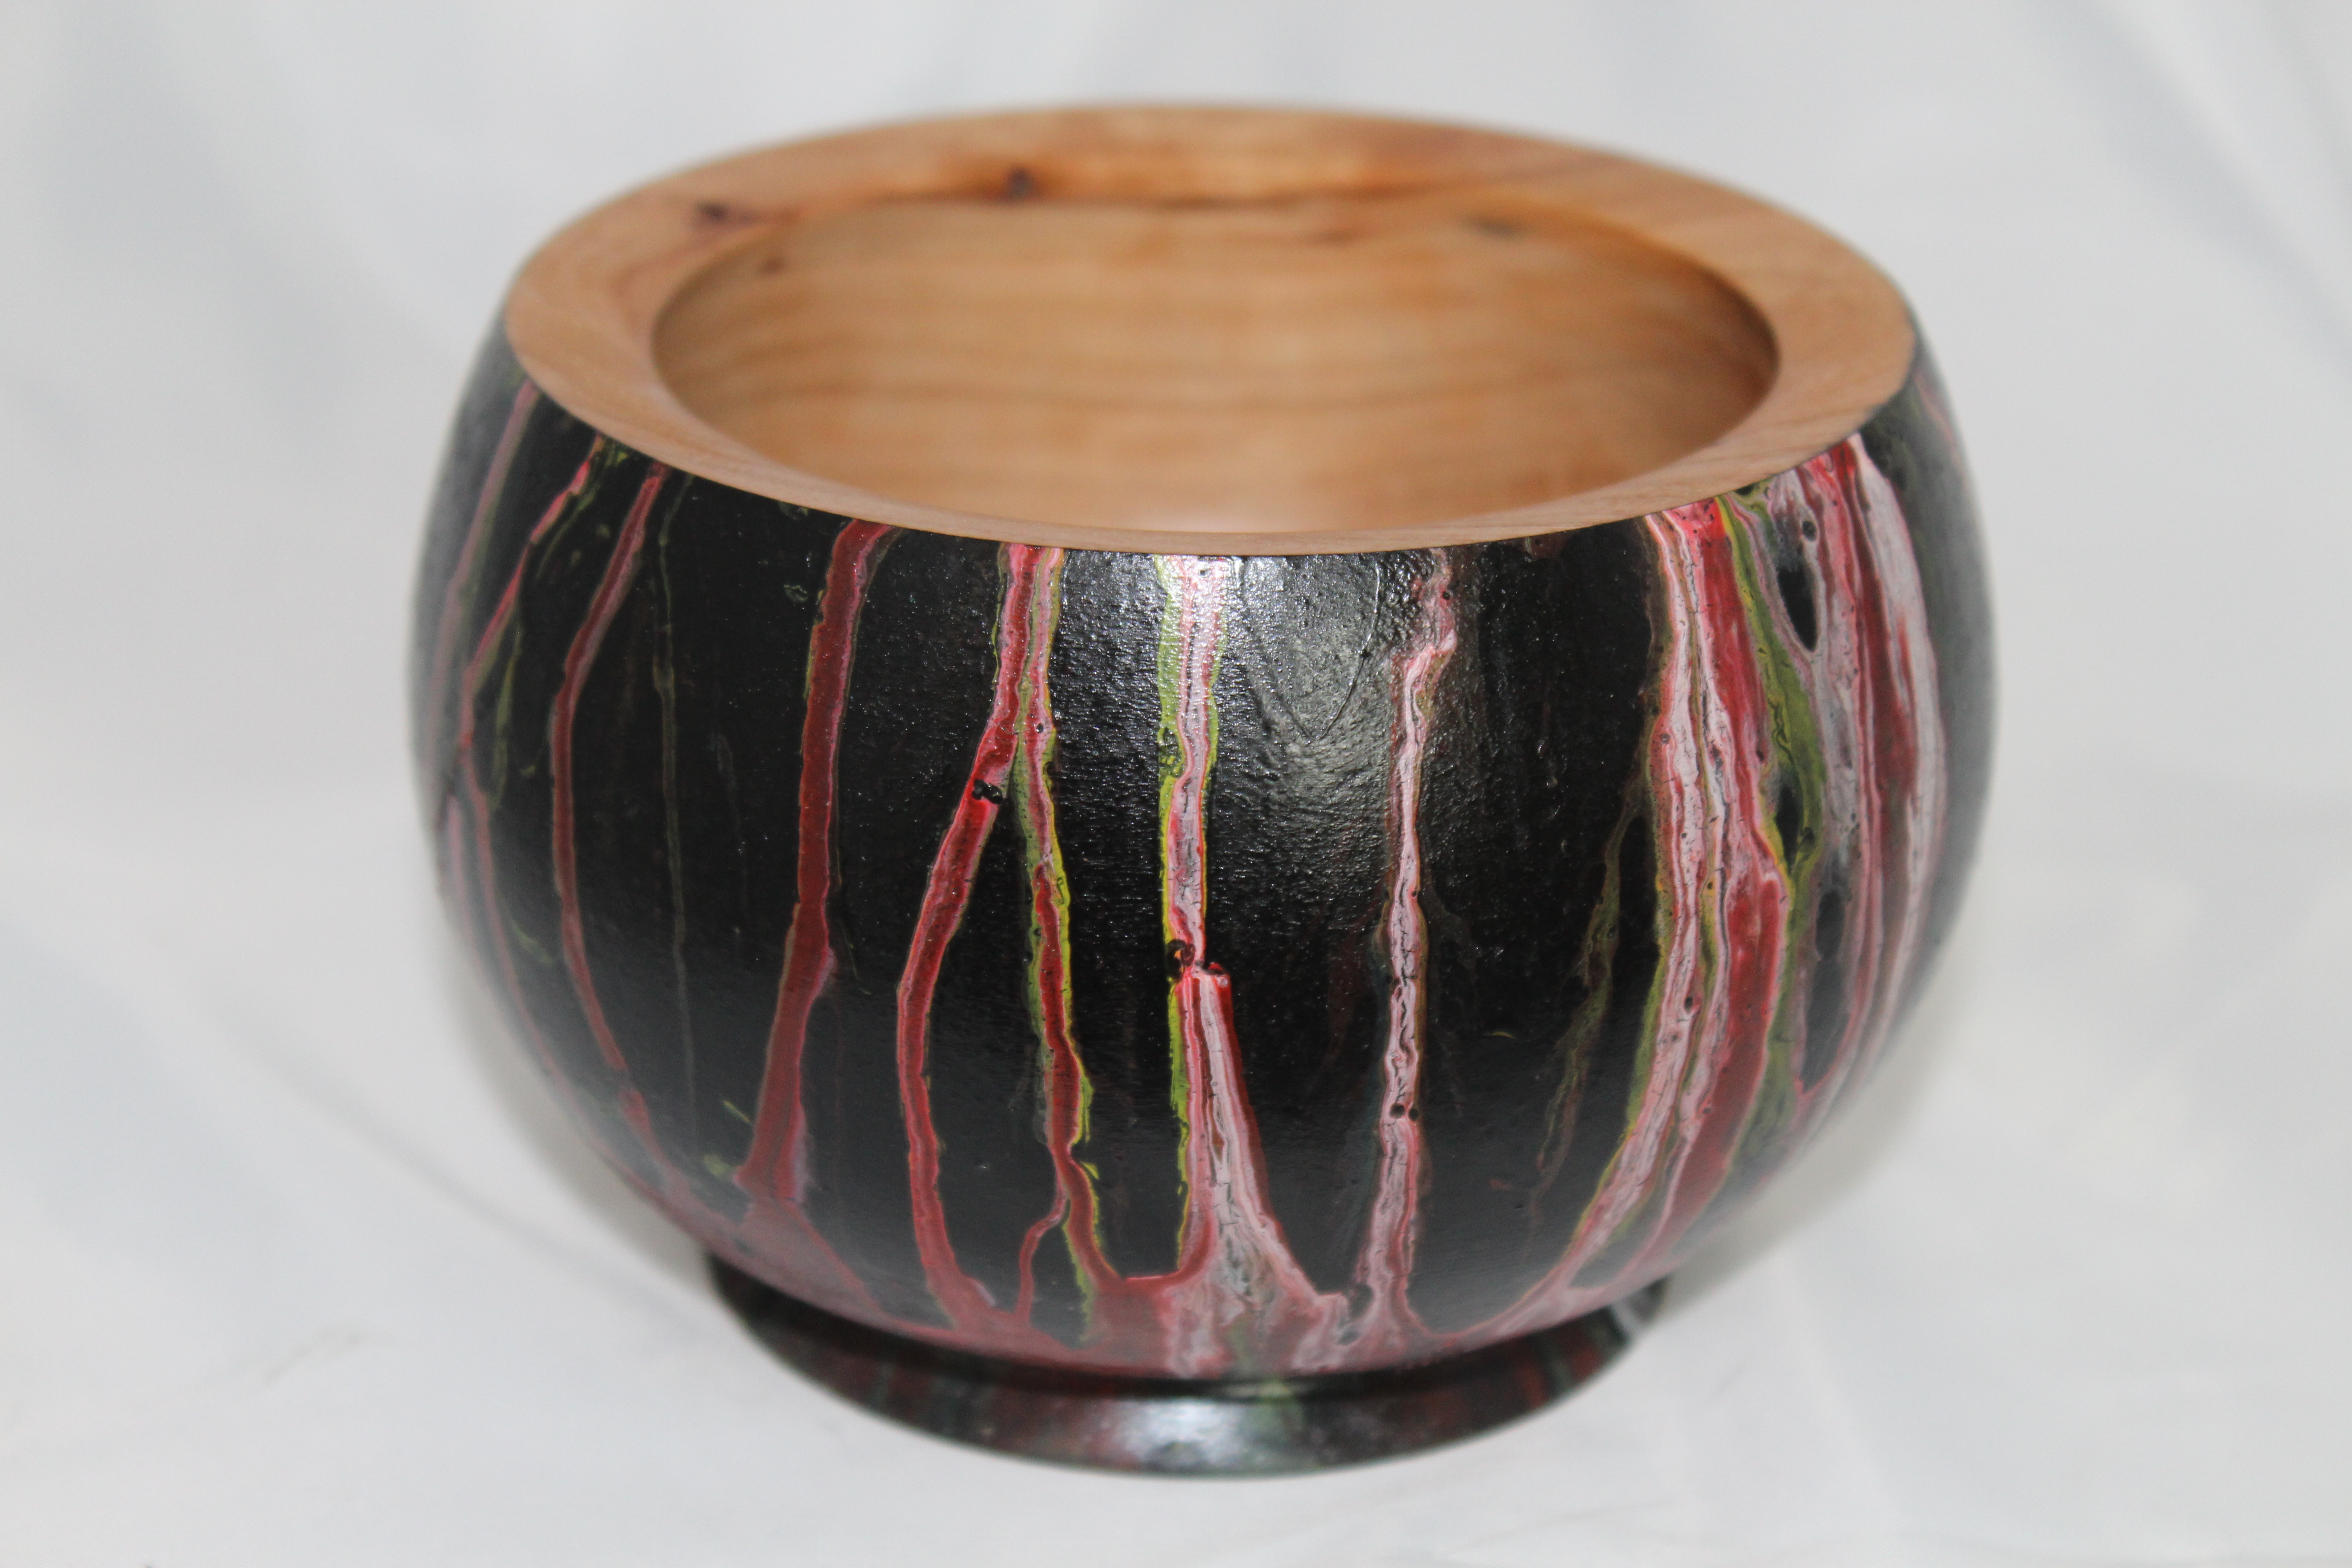
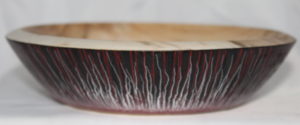
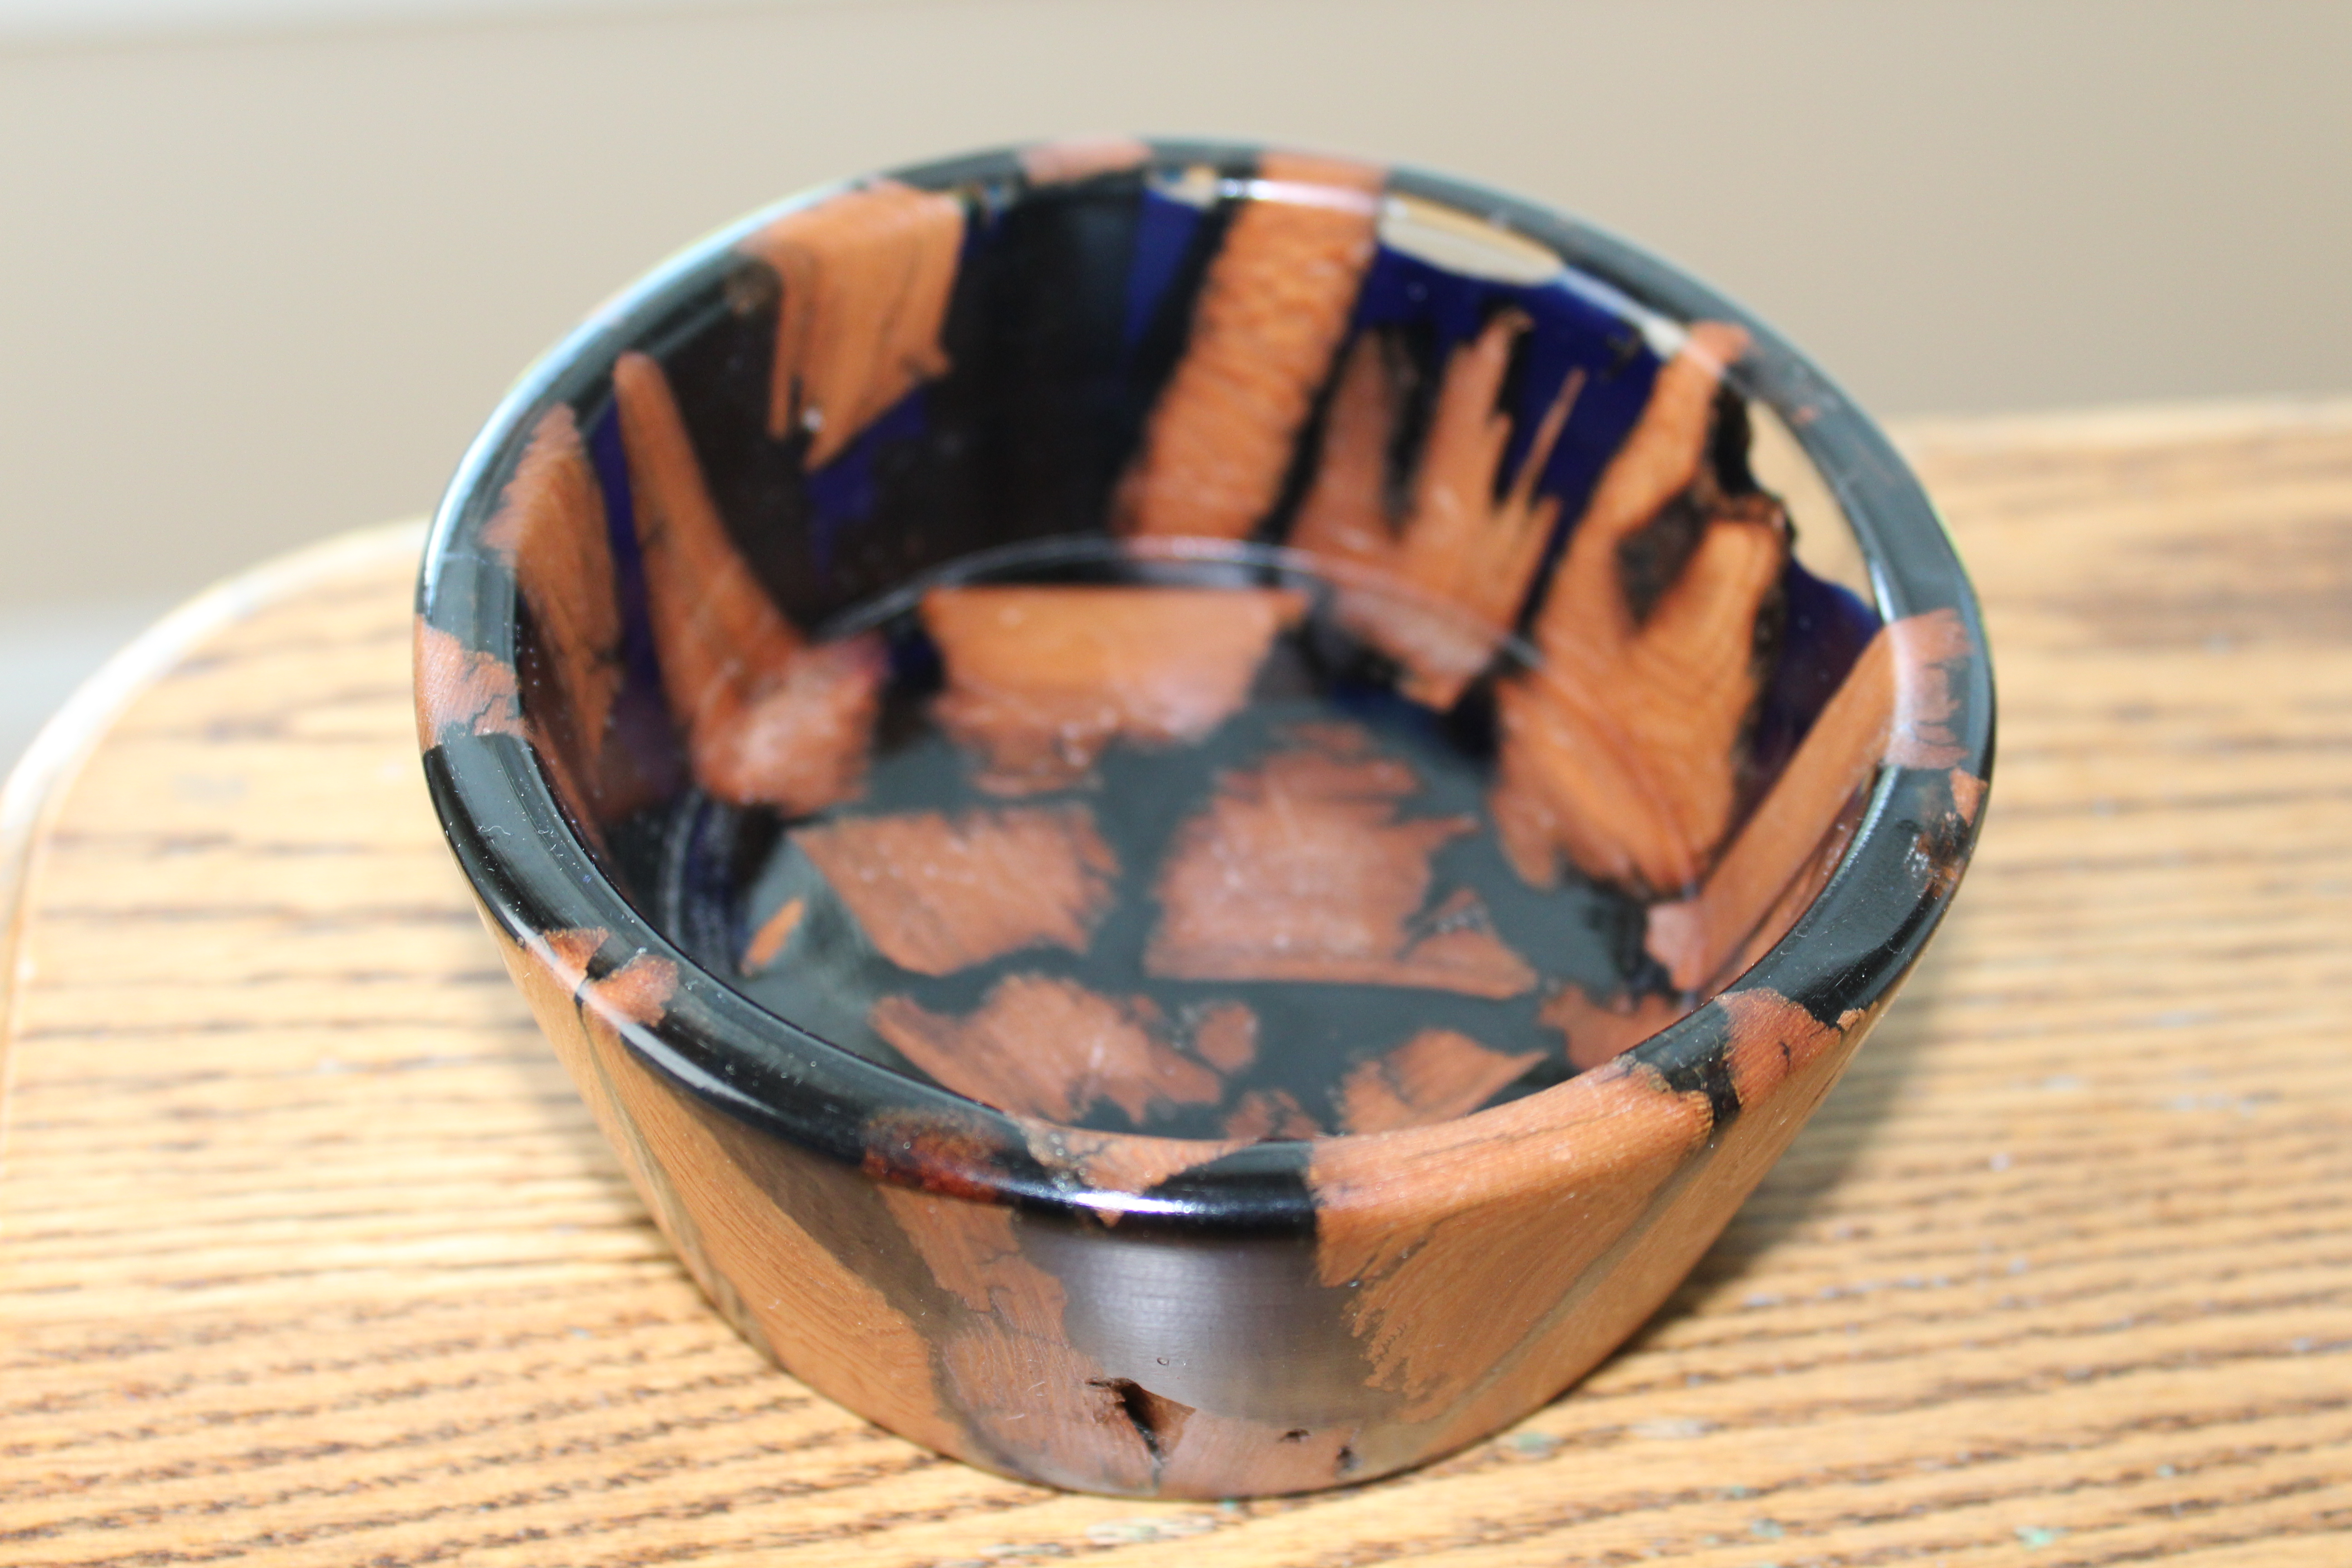
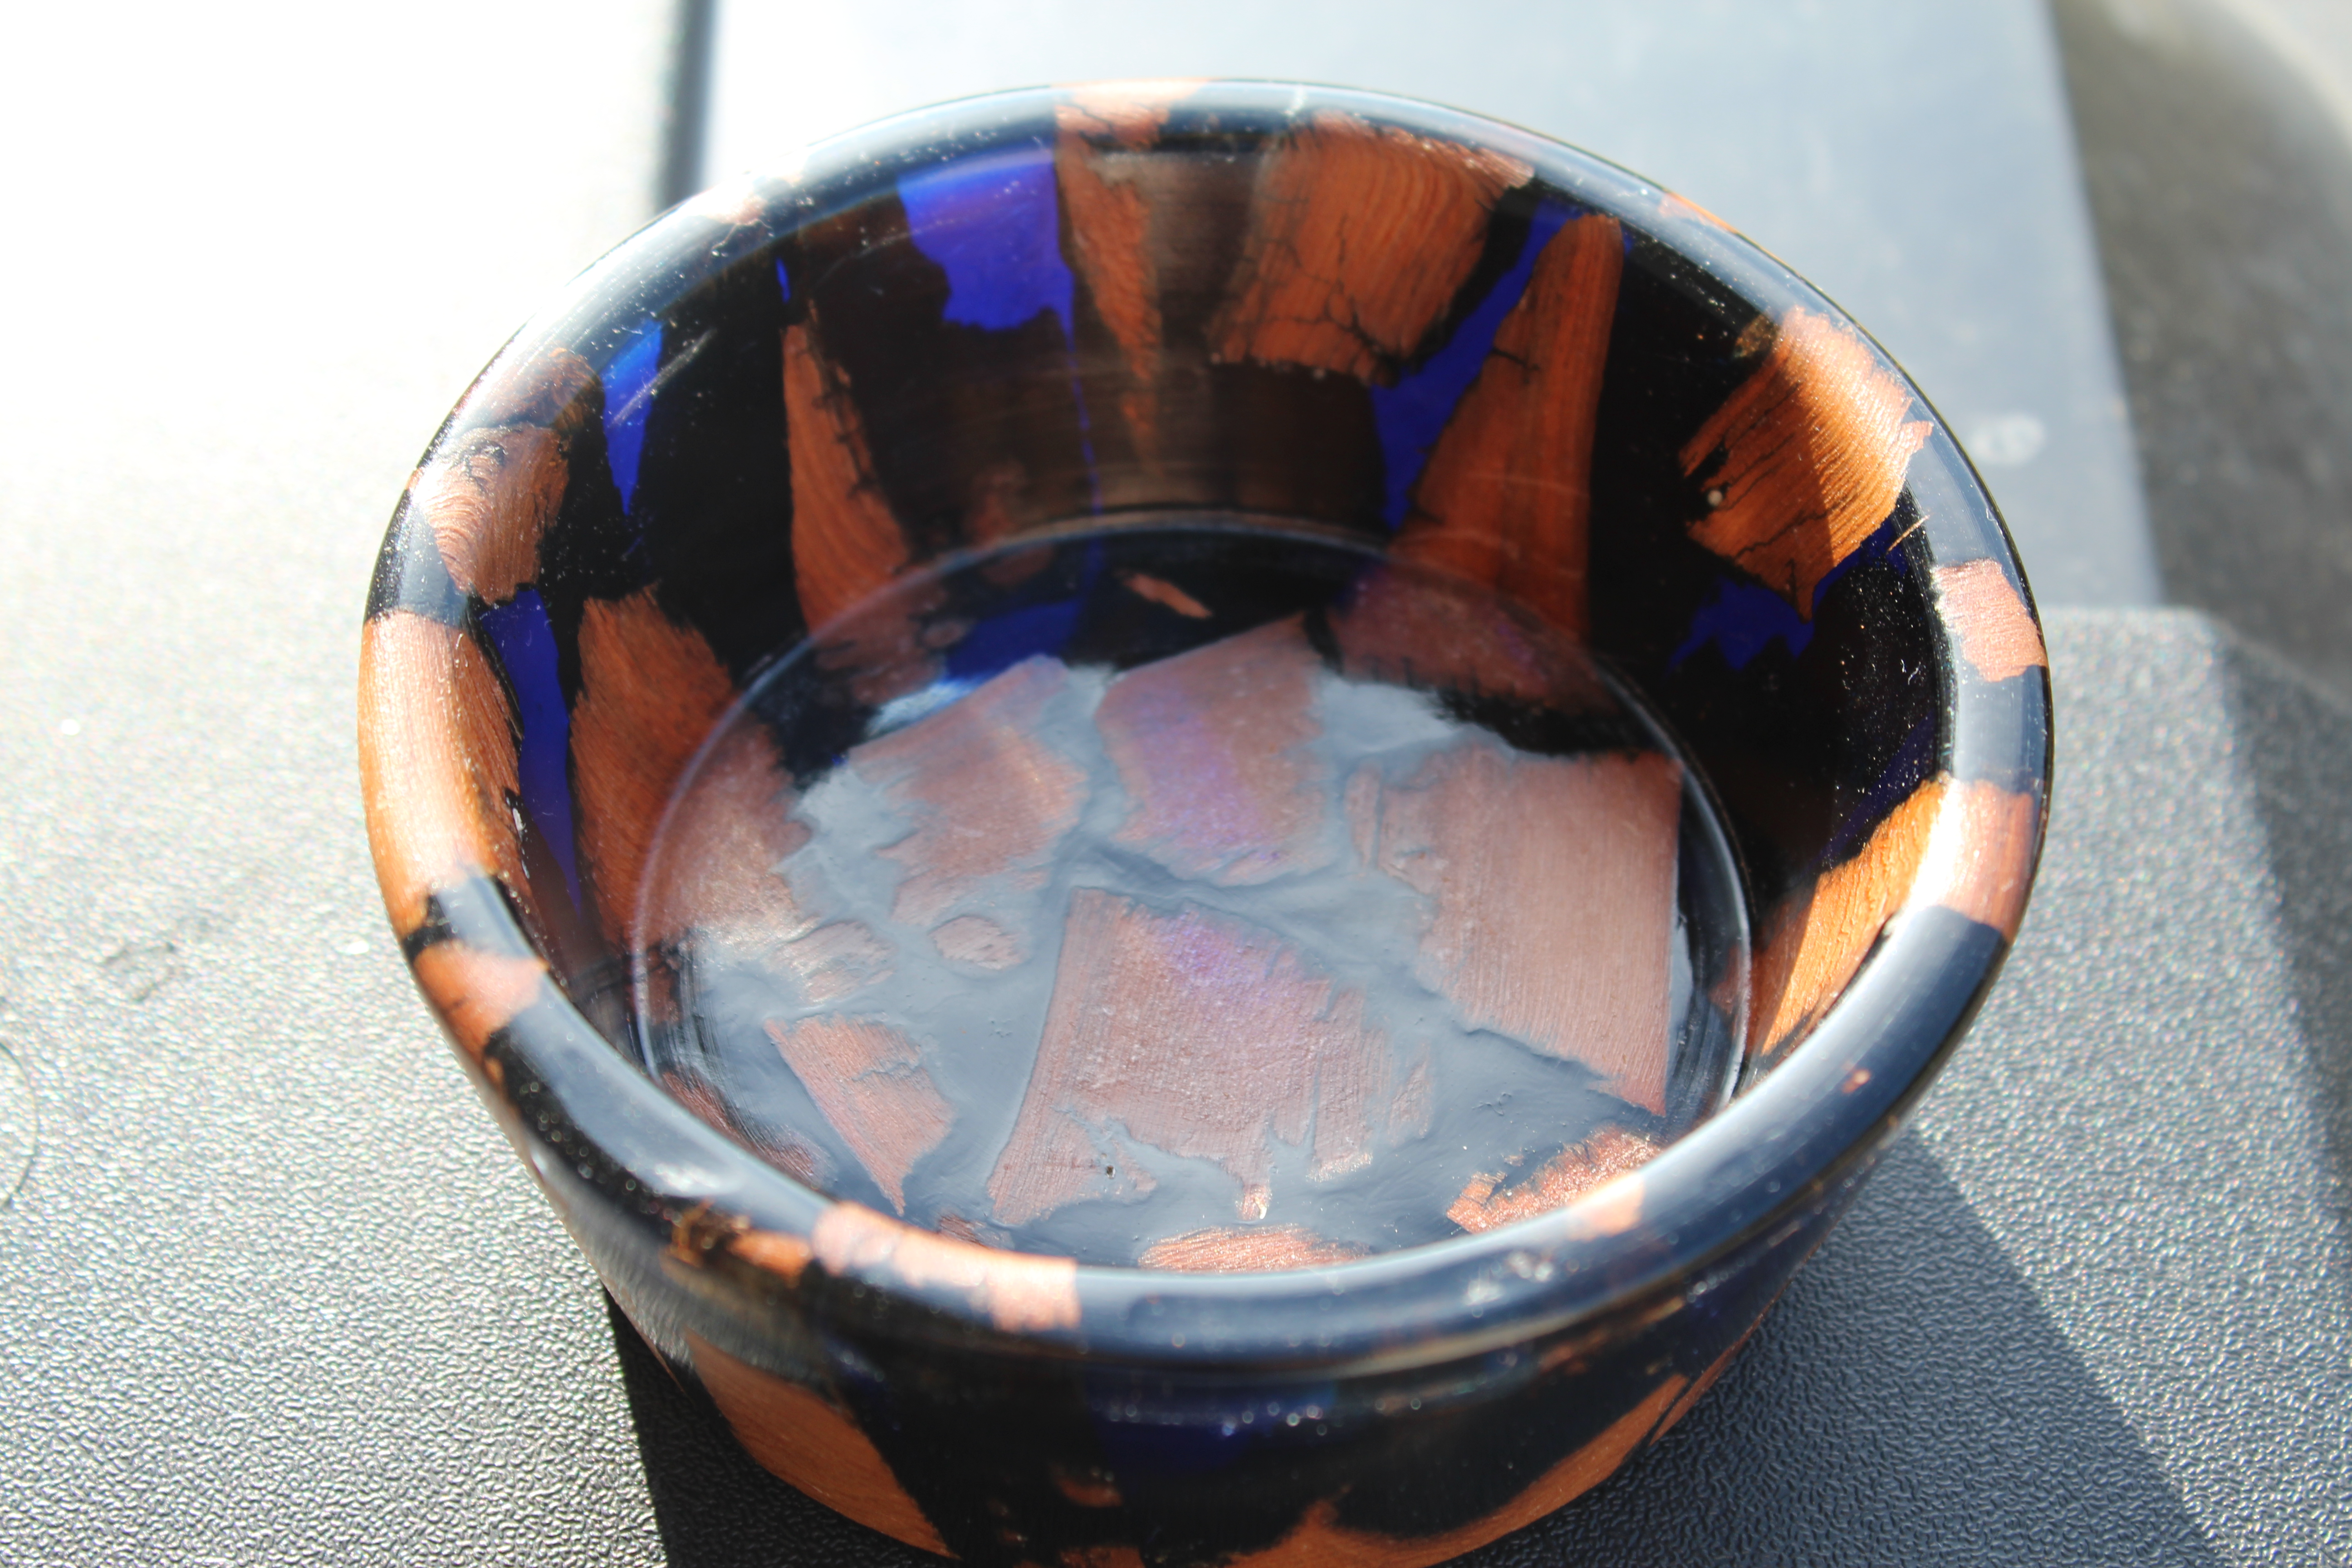
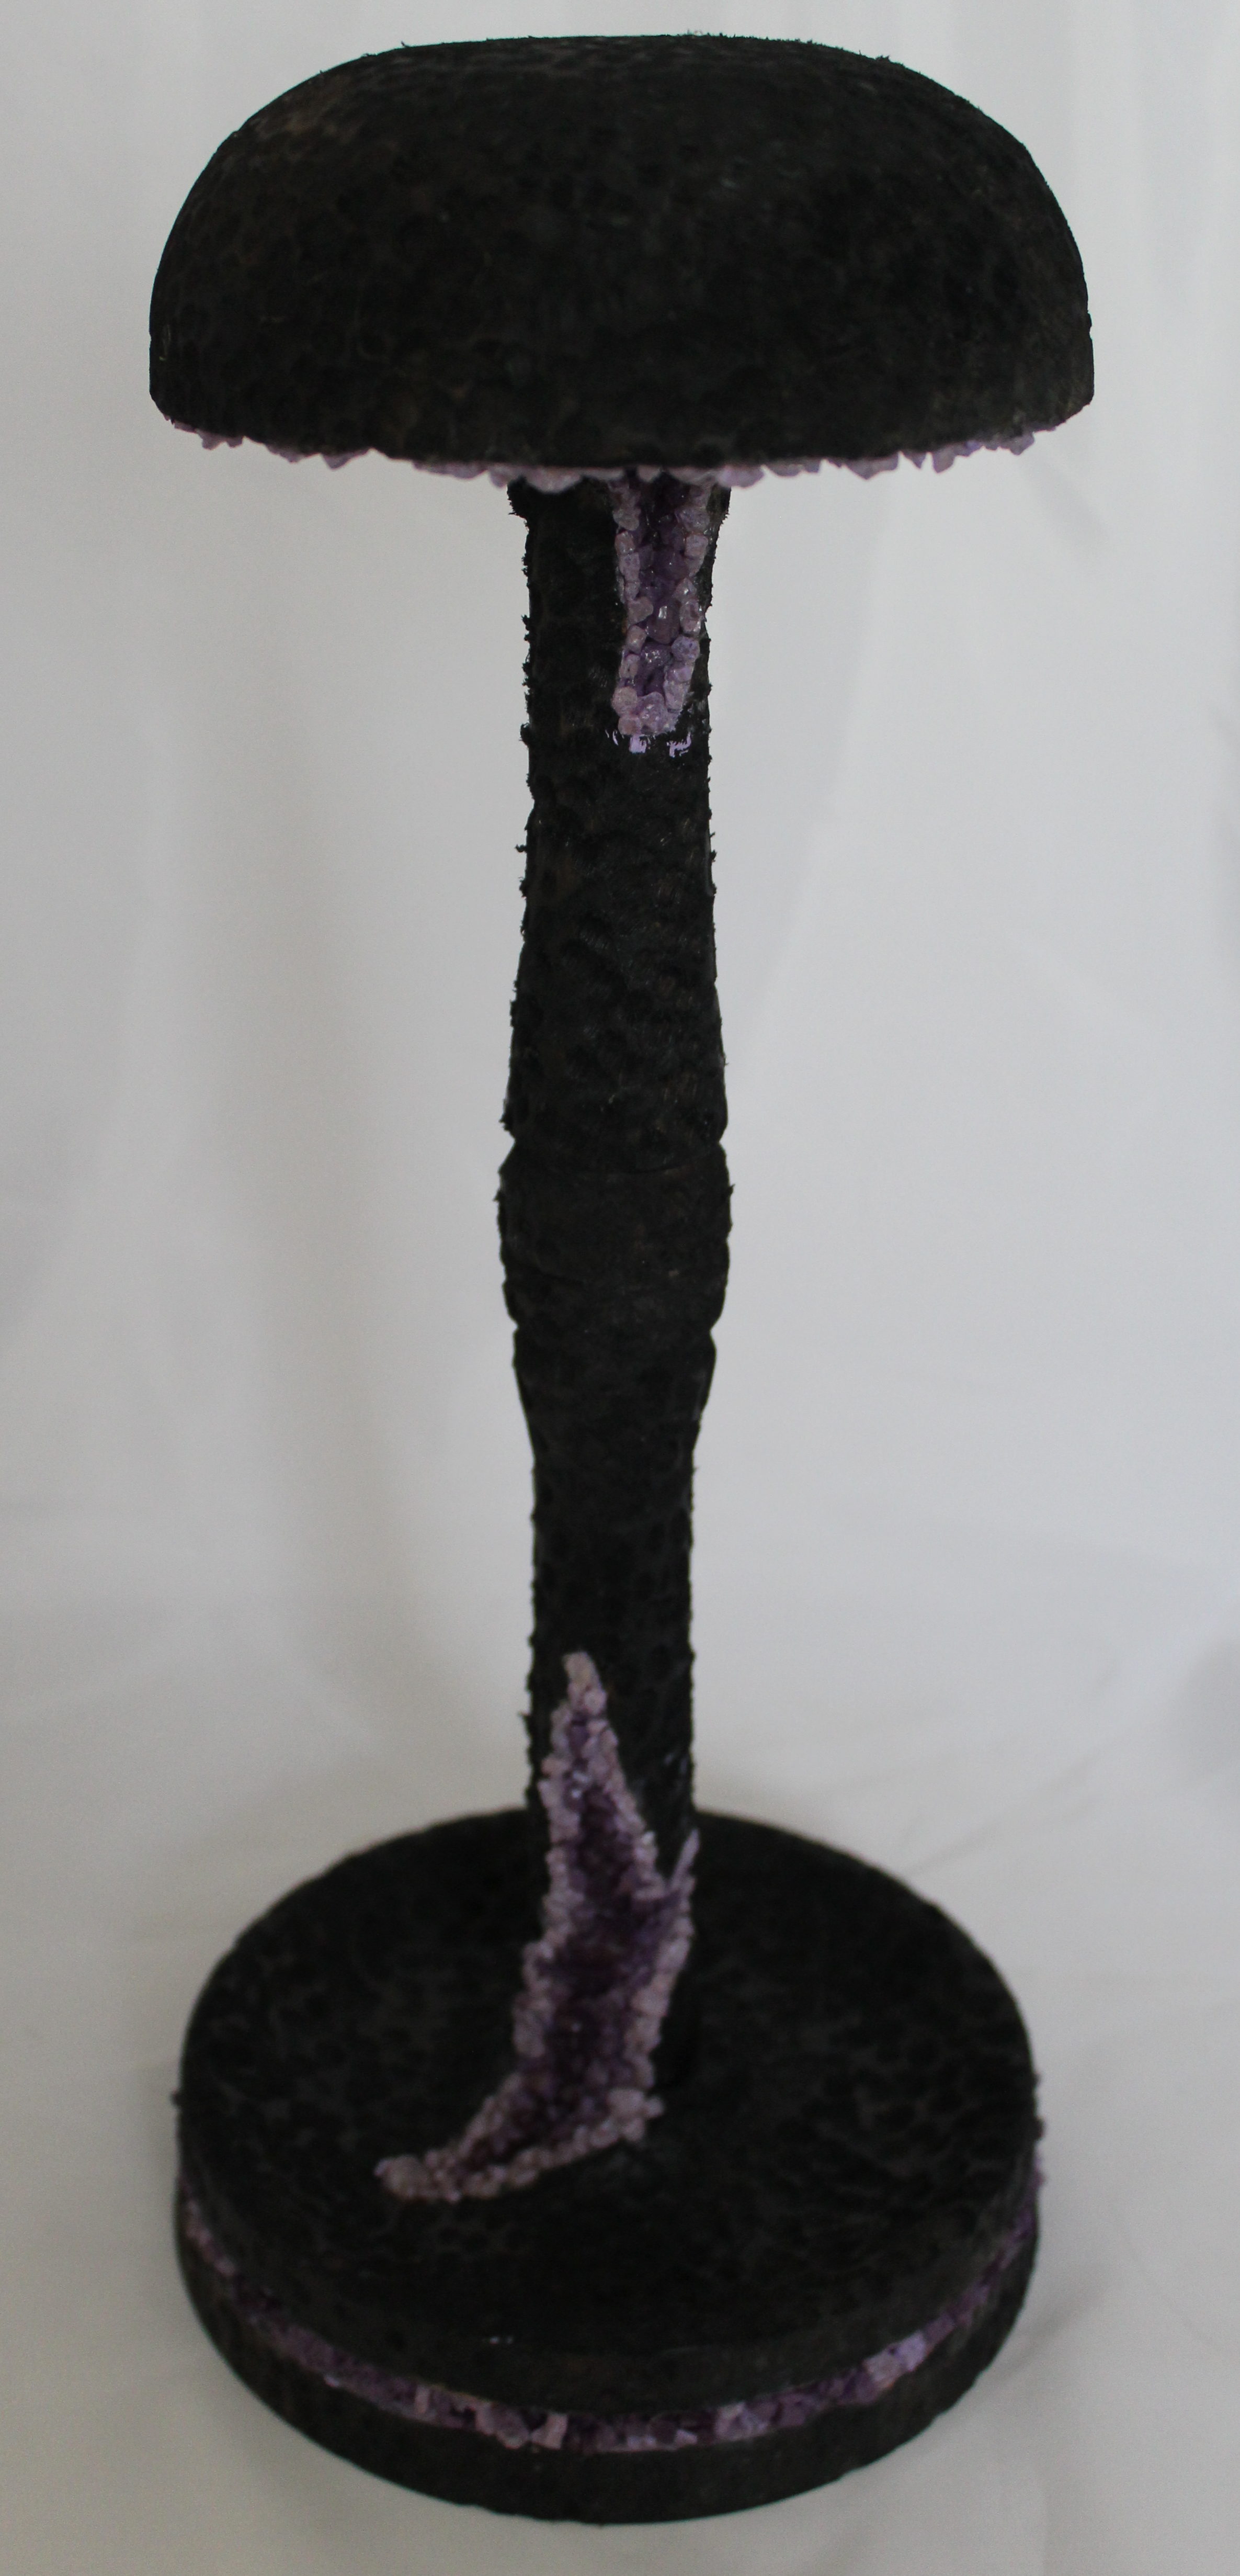
I had a piece of cherry that I cut down into smaller bowl blanks to use for a woodturning class that I was teaching. When I was done, I found a cutoff piece that wasn’t really big enough to use for a large project, but it was too big to be thrown away. I chucked it up and figured I’d see what I could make from it. I really was just playing around, thinking I’d make something that might be good for holding desk supplies, pens, or maybe the tubes of chap stick that one daughter always seems to need. (Yes, Jenny, I’m talking about you!) If nothing else, I’d turn it into shavings, just to watch them fly off the lathe. When I put the coat of black on it to start the paint pouring process, I realized I had actually created a mini cauldron.
Funny how your mind works sometimes. Here I am thinking about all the crap my ex-wife is pulling these days and the next thing you know, out pops a witch’s accessory. That Freud guy may have been on to something…
Not sure why, but I kinda like this little guy!
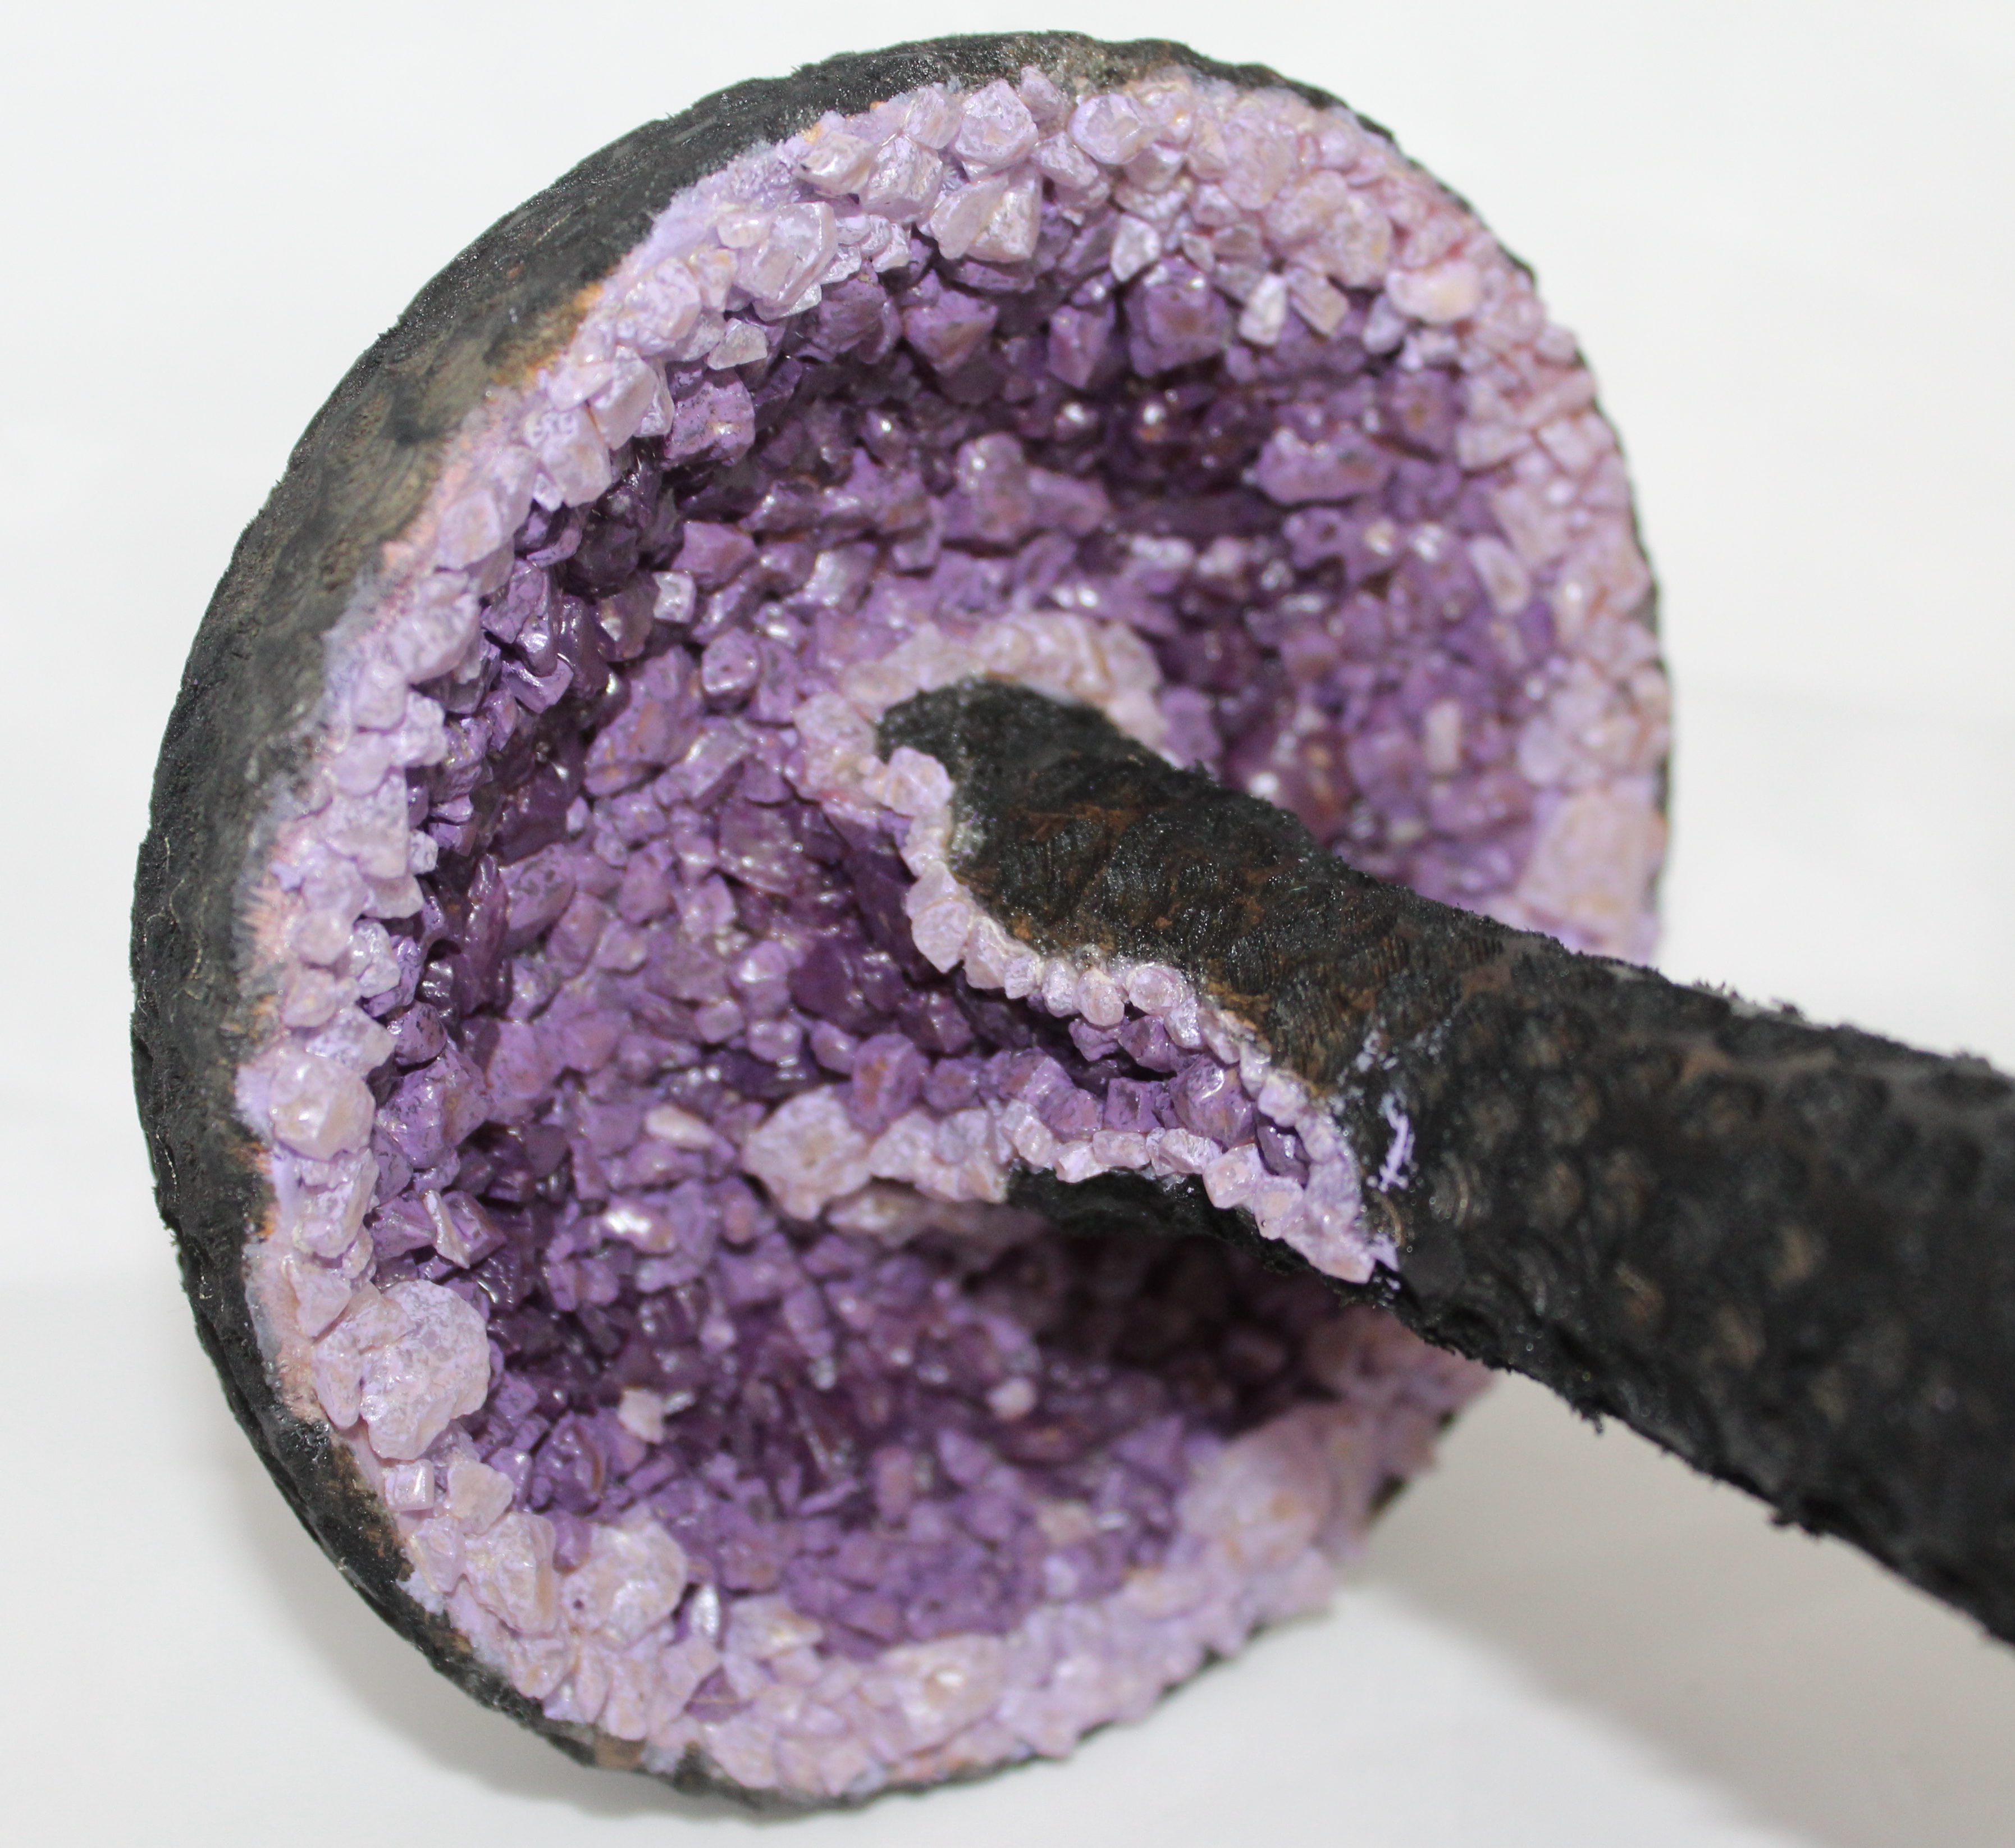
I can’t tell if the paint looks like something’s dripped over the edge at some point, or if something is growing up the side…
This is the thing about my kids: They are so supportive of me and the attempt at (finally) beginning life 2.0, they try to help me with anything they think I’m doing just for myself. If I say I have a happy hour I’m supposed to go to, they’re right there volunteering to drive me home so I can enjoy myself without having to worry about a DUI. If I casually mention there’s a movie coming out that I’d like to see, they get busy trying to rearrange schedules to find a time where they can go with me and I don’t have to see the movie by myself. It’s super sweet and I’m still trying to figure out why they care so much, when in all reality, I don’t deserve it.
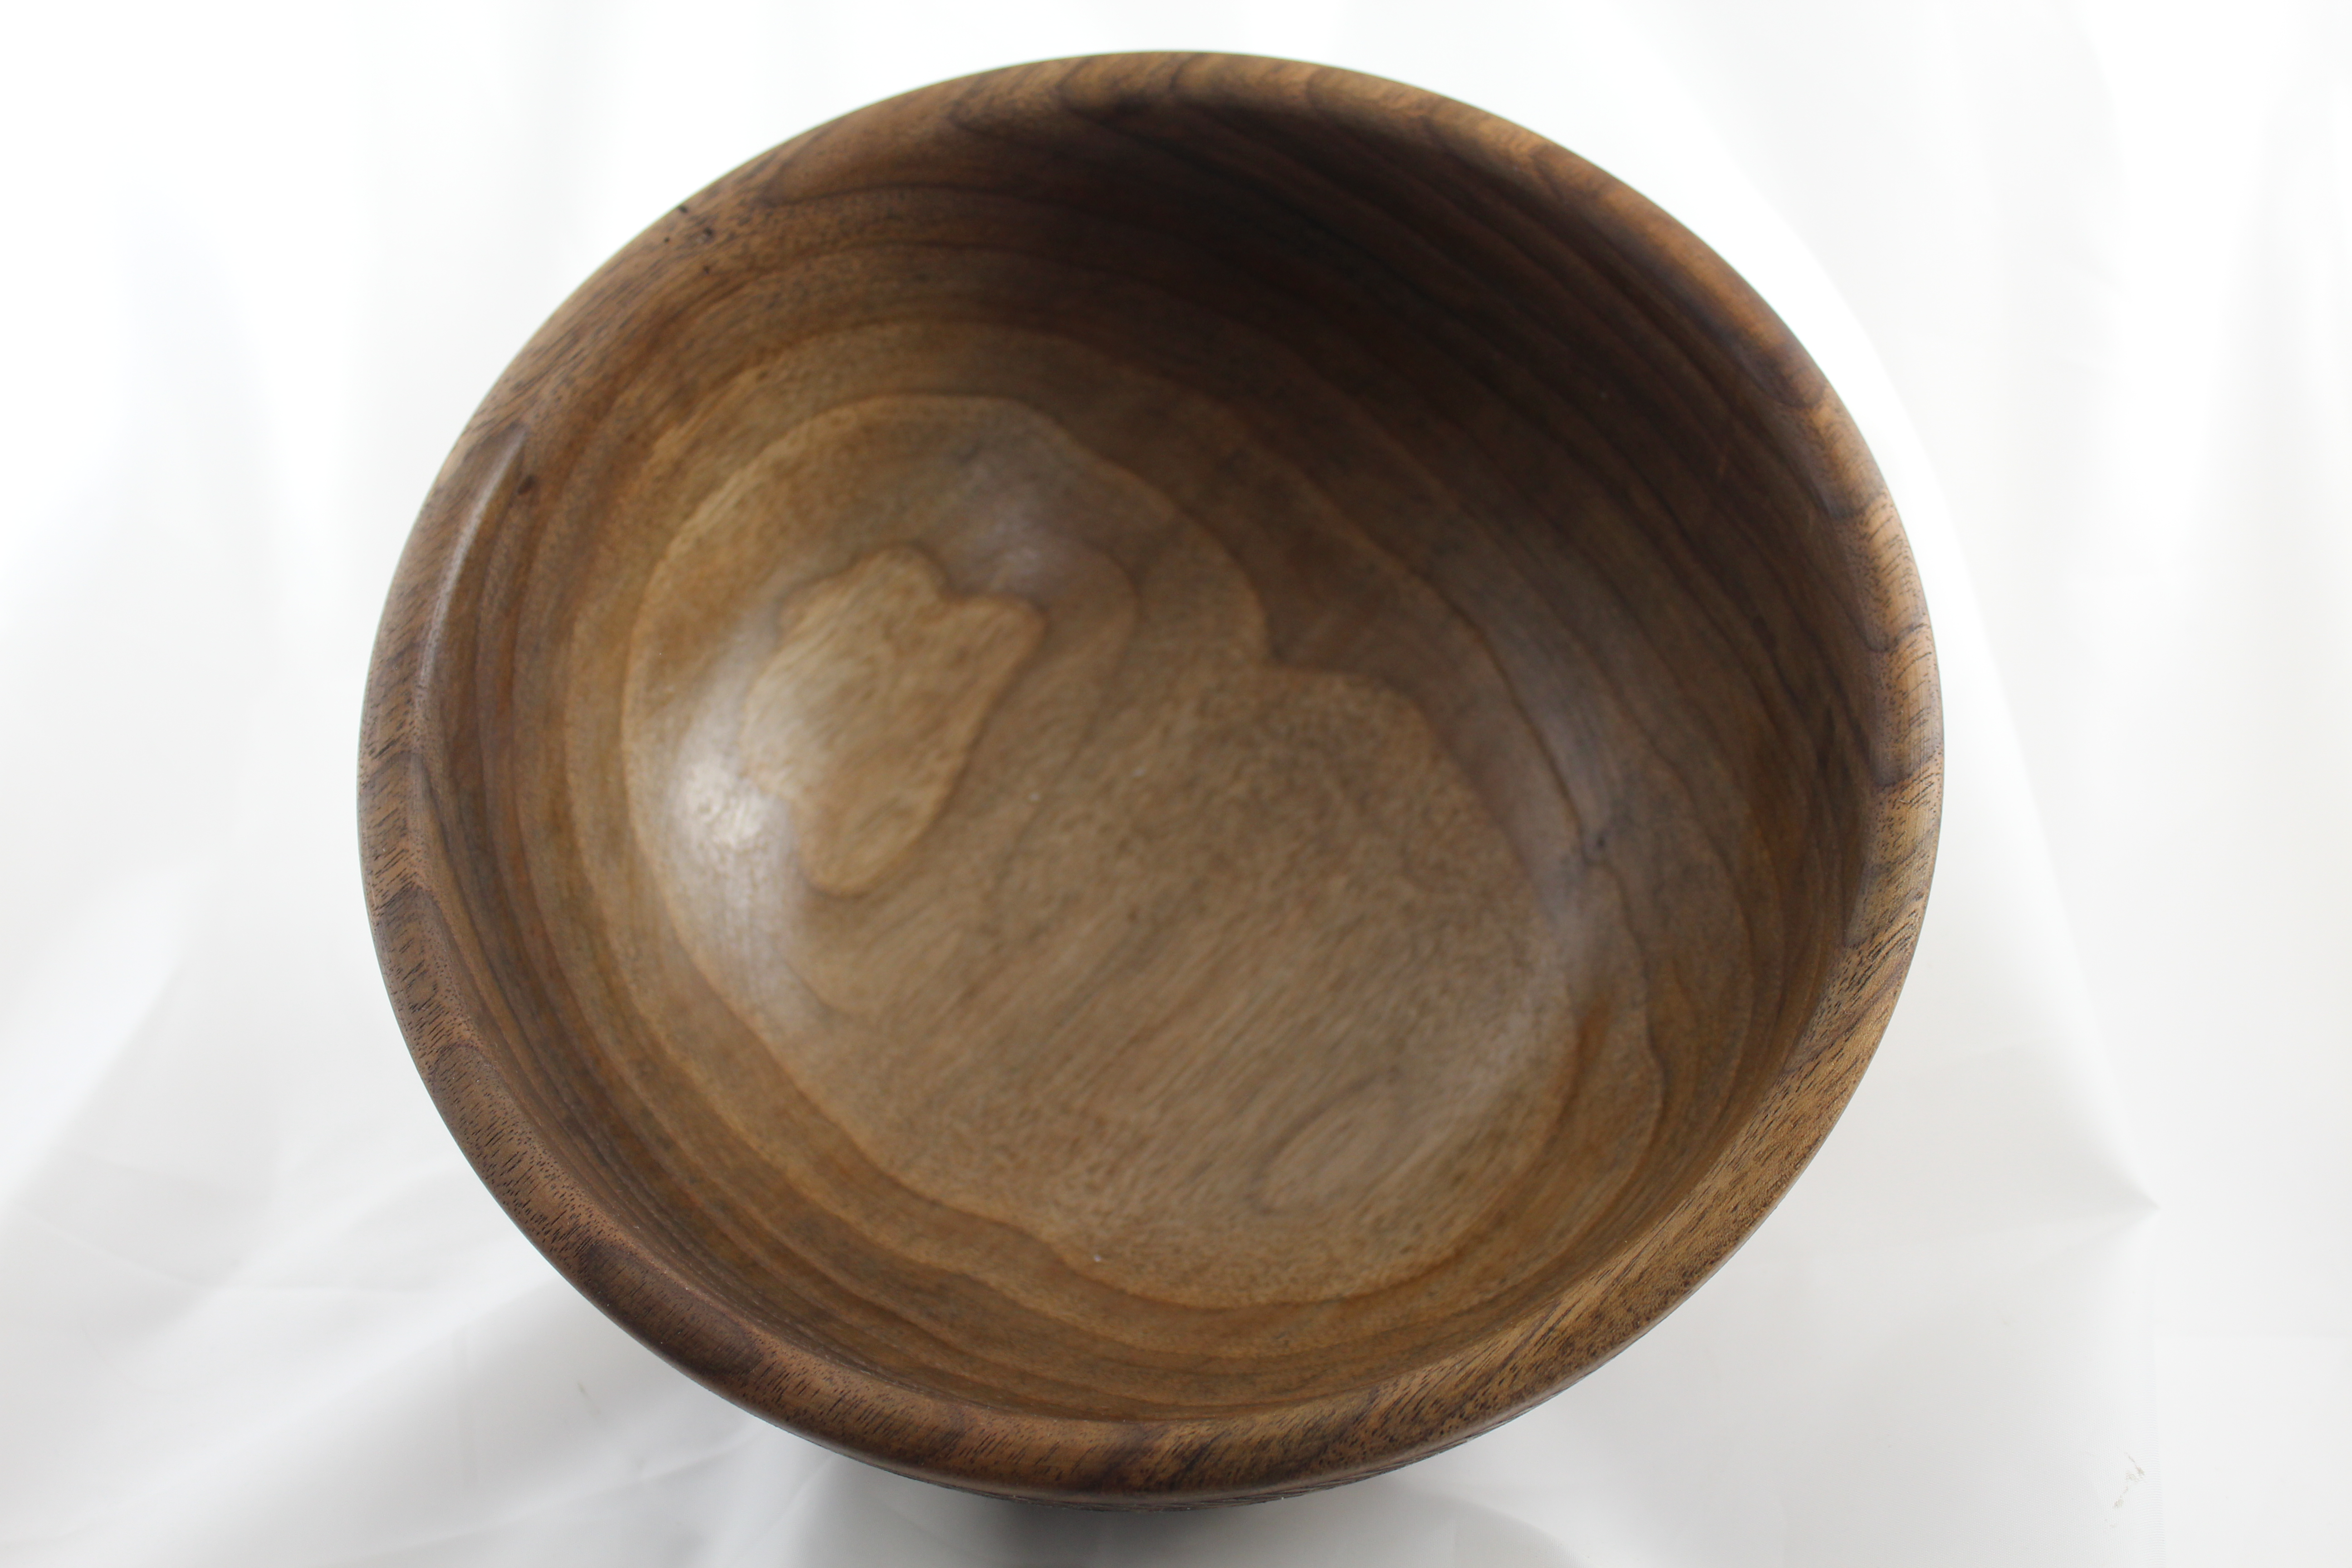
Their support of my woodturning hobby quickly became the number one focus of the kids. They will accompany me to the woodturning meetings, just to help watch the door so I can enjoy the meeting itself. When I complete a project, they tell me how wonderful it is, even when it’s not. They have also become the city’s best wood scavengers! Earlier this spring, I got a text from one of the kids alerting me to a large birch tree that had been taken down by a homeowner and put on the curb for the city to collect. For me, those texts are like being sent the secret coordinates to some kind of pirate treasure, since there’s never any guarantee if what you find will be junk or priceless. This day, it was a jackpot! By the time I could get there, much of the wood was picked over. The crafters had come and taken all of the small, straight branches. The firewood pickers had come and taken all of the limb wood and most of the trunk. But as luck would have it, the larger, heavier, pieces of the trunk where the branches had started tom come out must have been too heavy for the other looters, so they were sitting there waiting to be liberated. This is exactly what a woodturner is looking to procure! I took the two logs home, split them, sealed the ends, and left them in the garage to dry. Being freshly cut, I figure it’d be two years, minimum, before they would be dry enough to work. Not being a patient man, I decided to rough turn them into bowl, then put them in my makeshift kiln to speed up the process. After about two weeks in my overgrown EZ-Bake oven, I fished one of the pieces out and realized it was already dry enough to finish turn.
Since I’ve been playing with color lately, my initial though was to use aniline dye on the wood and perhaps some India inks to accentuate the grain patterns and slight burl that I had hoped would be present in the finished bowl. When the lathe stopped spinning after the sanding was completed, any thought of adding color was gone when I saw the ripple across the bottom of the bowl and the way the light “flashed” when the bowl was rotated. The technical term for this effect is chatoyance, but in laymen’s terms is just really frickin’ cool looking wood.
This has a simple wax finish and will be buffed to a higher gloss once the finish cures for a day or so. Really like this one, even if it is “brown and round”!
Easily one of the prettiest pieces of birch that I have seen, and as luck would have it, I have the other side of this log almost ready to go!
The memorial day weekend is the kickoff for summer. For those who work summer jobs as lifeguards, that’s also the start of the sunburn, heatstroke, and “deal with all the crazy’s”. While my daughter’s were off trying to stay cool at the pool, I stayed home and tried to get a few projects finished up. Below are four different items I finished. All but one turned out the way I wanted. One, however, proved that no matter what kind of paint job is used for embellishment, there’s no hiding a really bad piece of wood! See if you can figure it out…
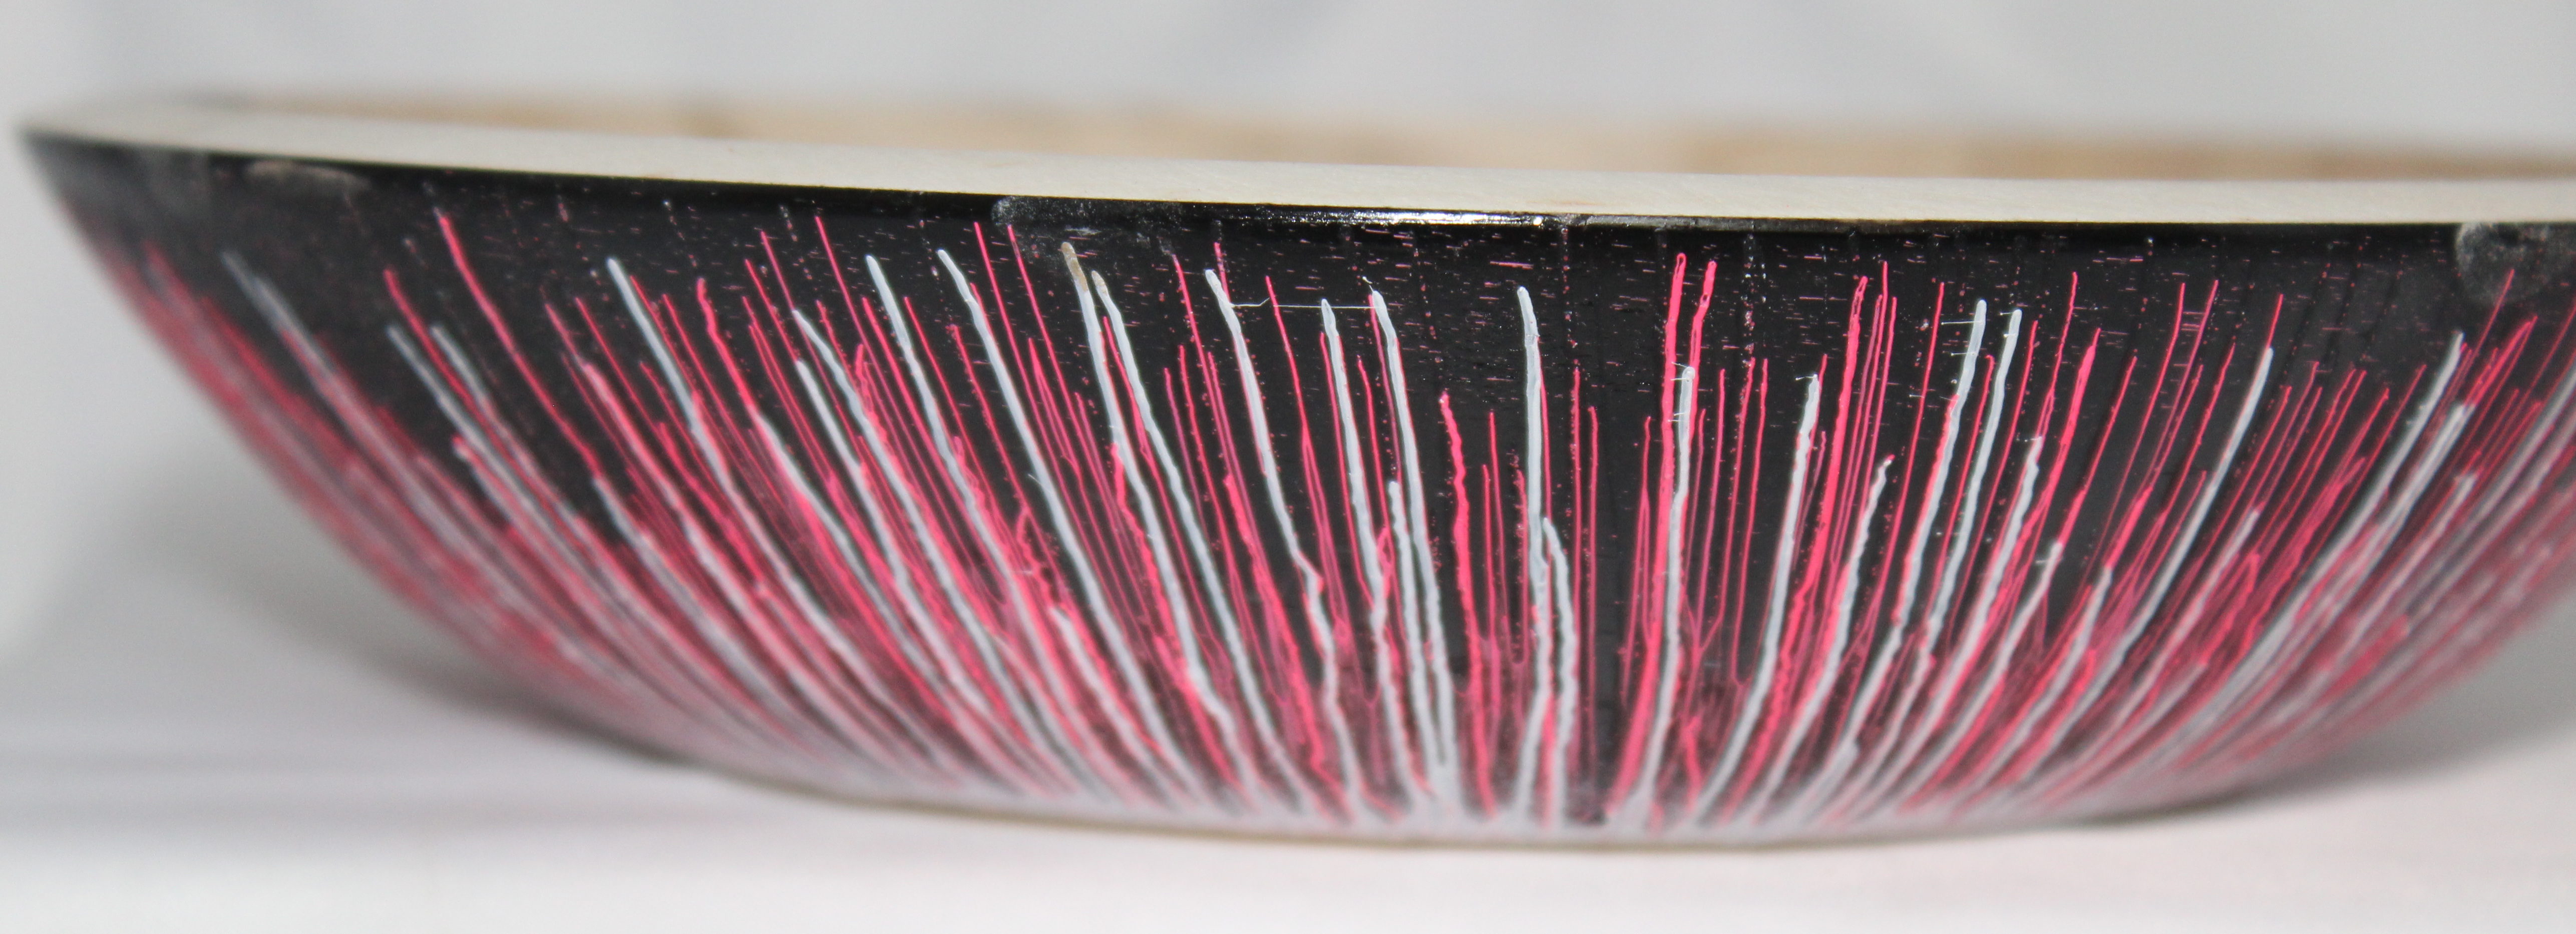
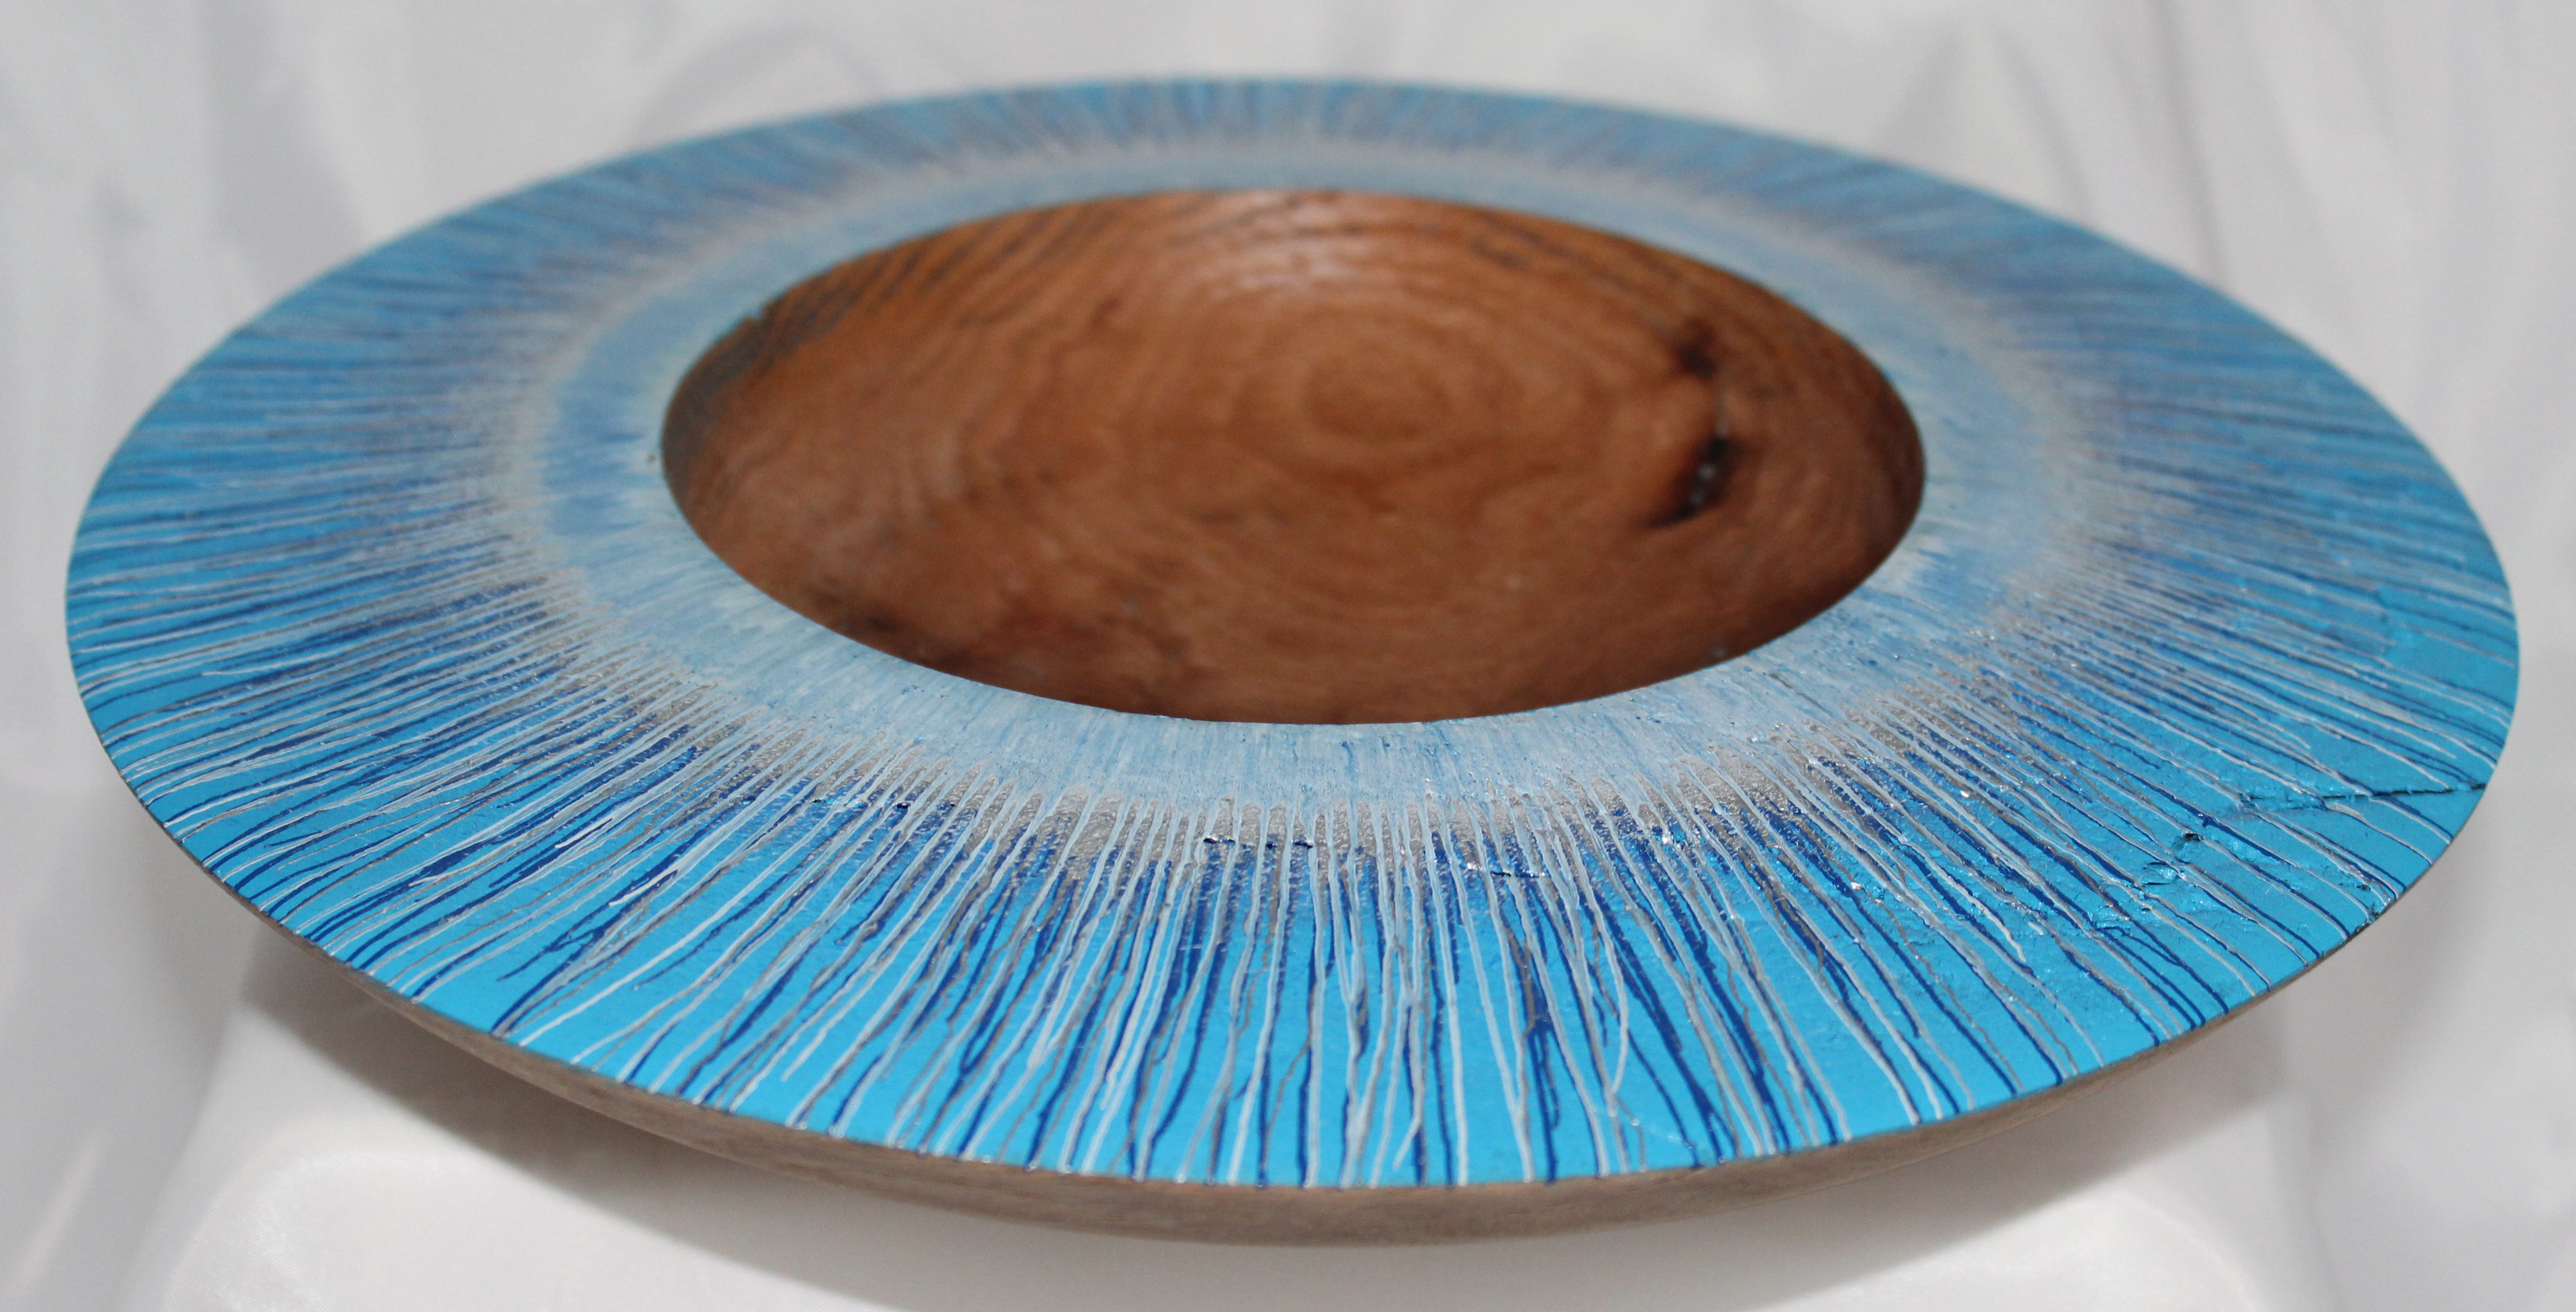
With the silver paint, this almost looks like lightening strikes when seen up close. For those who also survived high school at HHS, the color combination is completely incidental. Sorry if it caused bad flashbacks!Similar to the others, this one mixed bright pink paint with a little red and a little silver. My daughter said, “aaawwwww… You made a valentines day bowl”. NO!!! That day is not celebrated anymore!This is a repeat of a bowl that I had made earlier, only it’s a little smaller and the sequence of paint added was different. Up close, the center ring almost looks iridescent as the white and silver paint mixed themselves.This started out looking like Winne da Poohs honey bowl. I tried this paint technique to try to hide the damage to the wood caused by bugs that had started feasting on the wood.Up close, all the individual colors really come out.
And for those who are curious, the first one of these that will get burnt is the platter with the blue/silver rim. The wood under that paint is really nasty, split, and has obvious cracks running through it. I give it about a week before it literally rips itself apart.
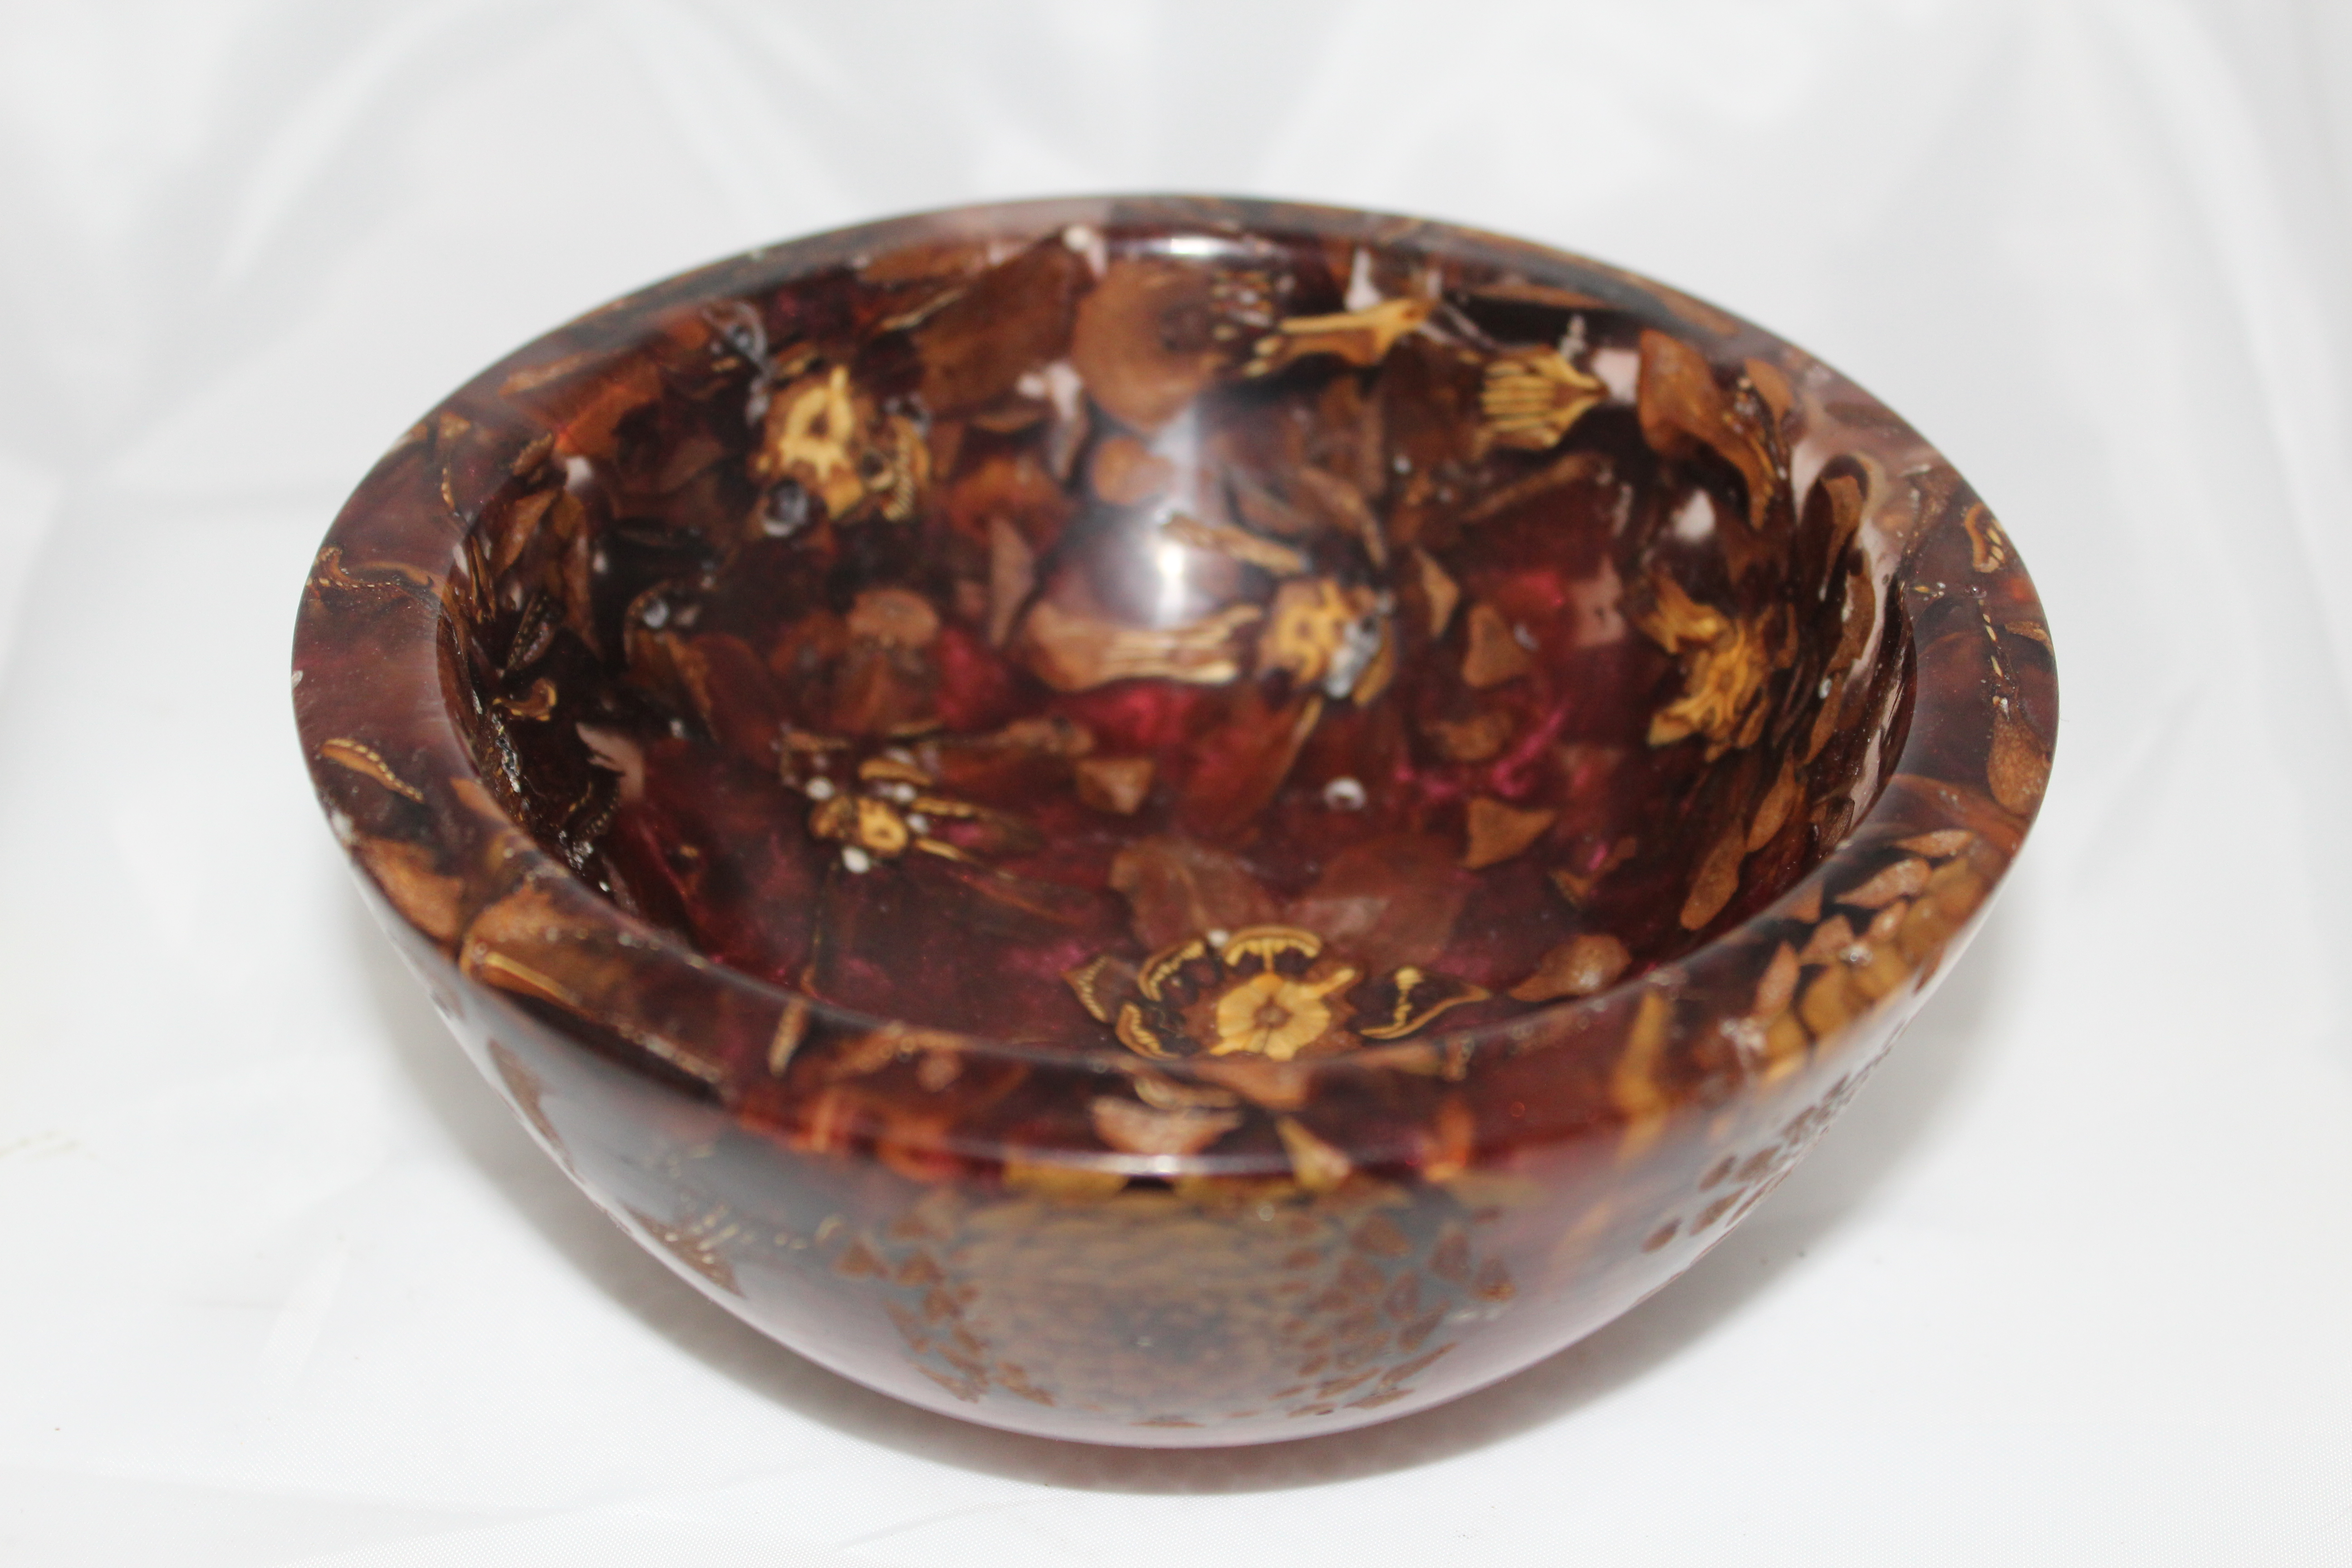
This weekend, while cleaning up some stuff in the garage, I once again came across a large box that has very old, very dry, cottonwood bark. This stuff has been sitting in the garage for at least 10 years, from back when I was carving the bark into little gnome homes. I’ve never wanted to throw the stuff away, but now, I don’t really want it taking up space, either. I decided to see what would happen if I mixed pieces of the bark (which is very soft) with epoxy (which is very hard), then try to make some kind of turning out of it. I cut a chuck of the bark into little jagged pieces, mixed some resin, added a cobalt blue dye, and let it cure in the pressure pot.
Turning the blank proved to be a challenge. I secured it to the lathe with a woodworm screw, but the screw mostly went into the bark, so the hold was pretty suspect. Then, as the tool alternated between laboring through the hard epoxy, only to hit a soft piece of bark, it became nearly impossible to keep the chisel from bouncing back and forth, causing more bark than epoxy to be removed. I ended up using the heaviest scraper I own, then moved VERY slowly, taking only miniscule cuts with each pass.
Here’s what I ended up with. when looking at it through normal interior lighting, the blue looks almost black.
This is with interior light and a little bit of morning sun shining in. There’s some clear epoxy visible on the very top that was intentional.
BUT… When natural light hits it, the deep, deep blue color comes out and really enhances the look of the bowl.
This was taken outside, with plenty of natural light to show through. Hopefully, the richness of the blue color will come through in the picture.
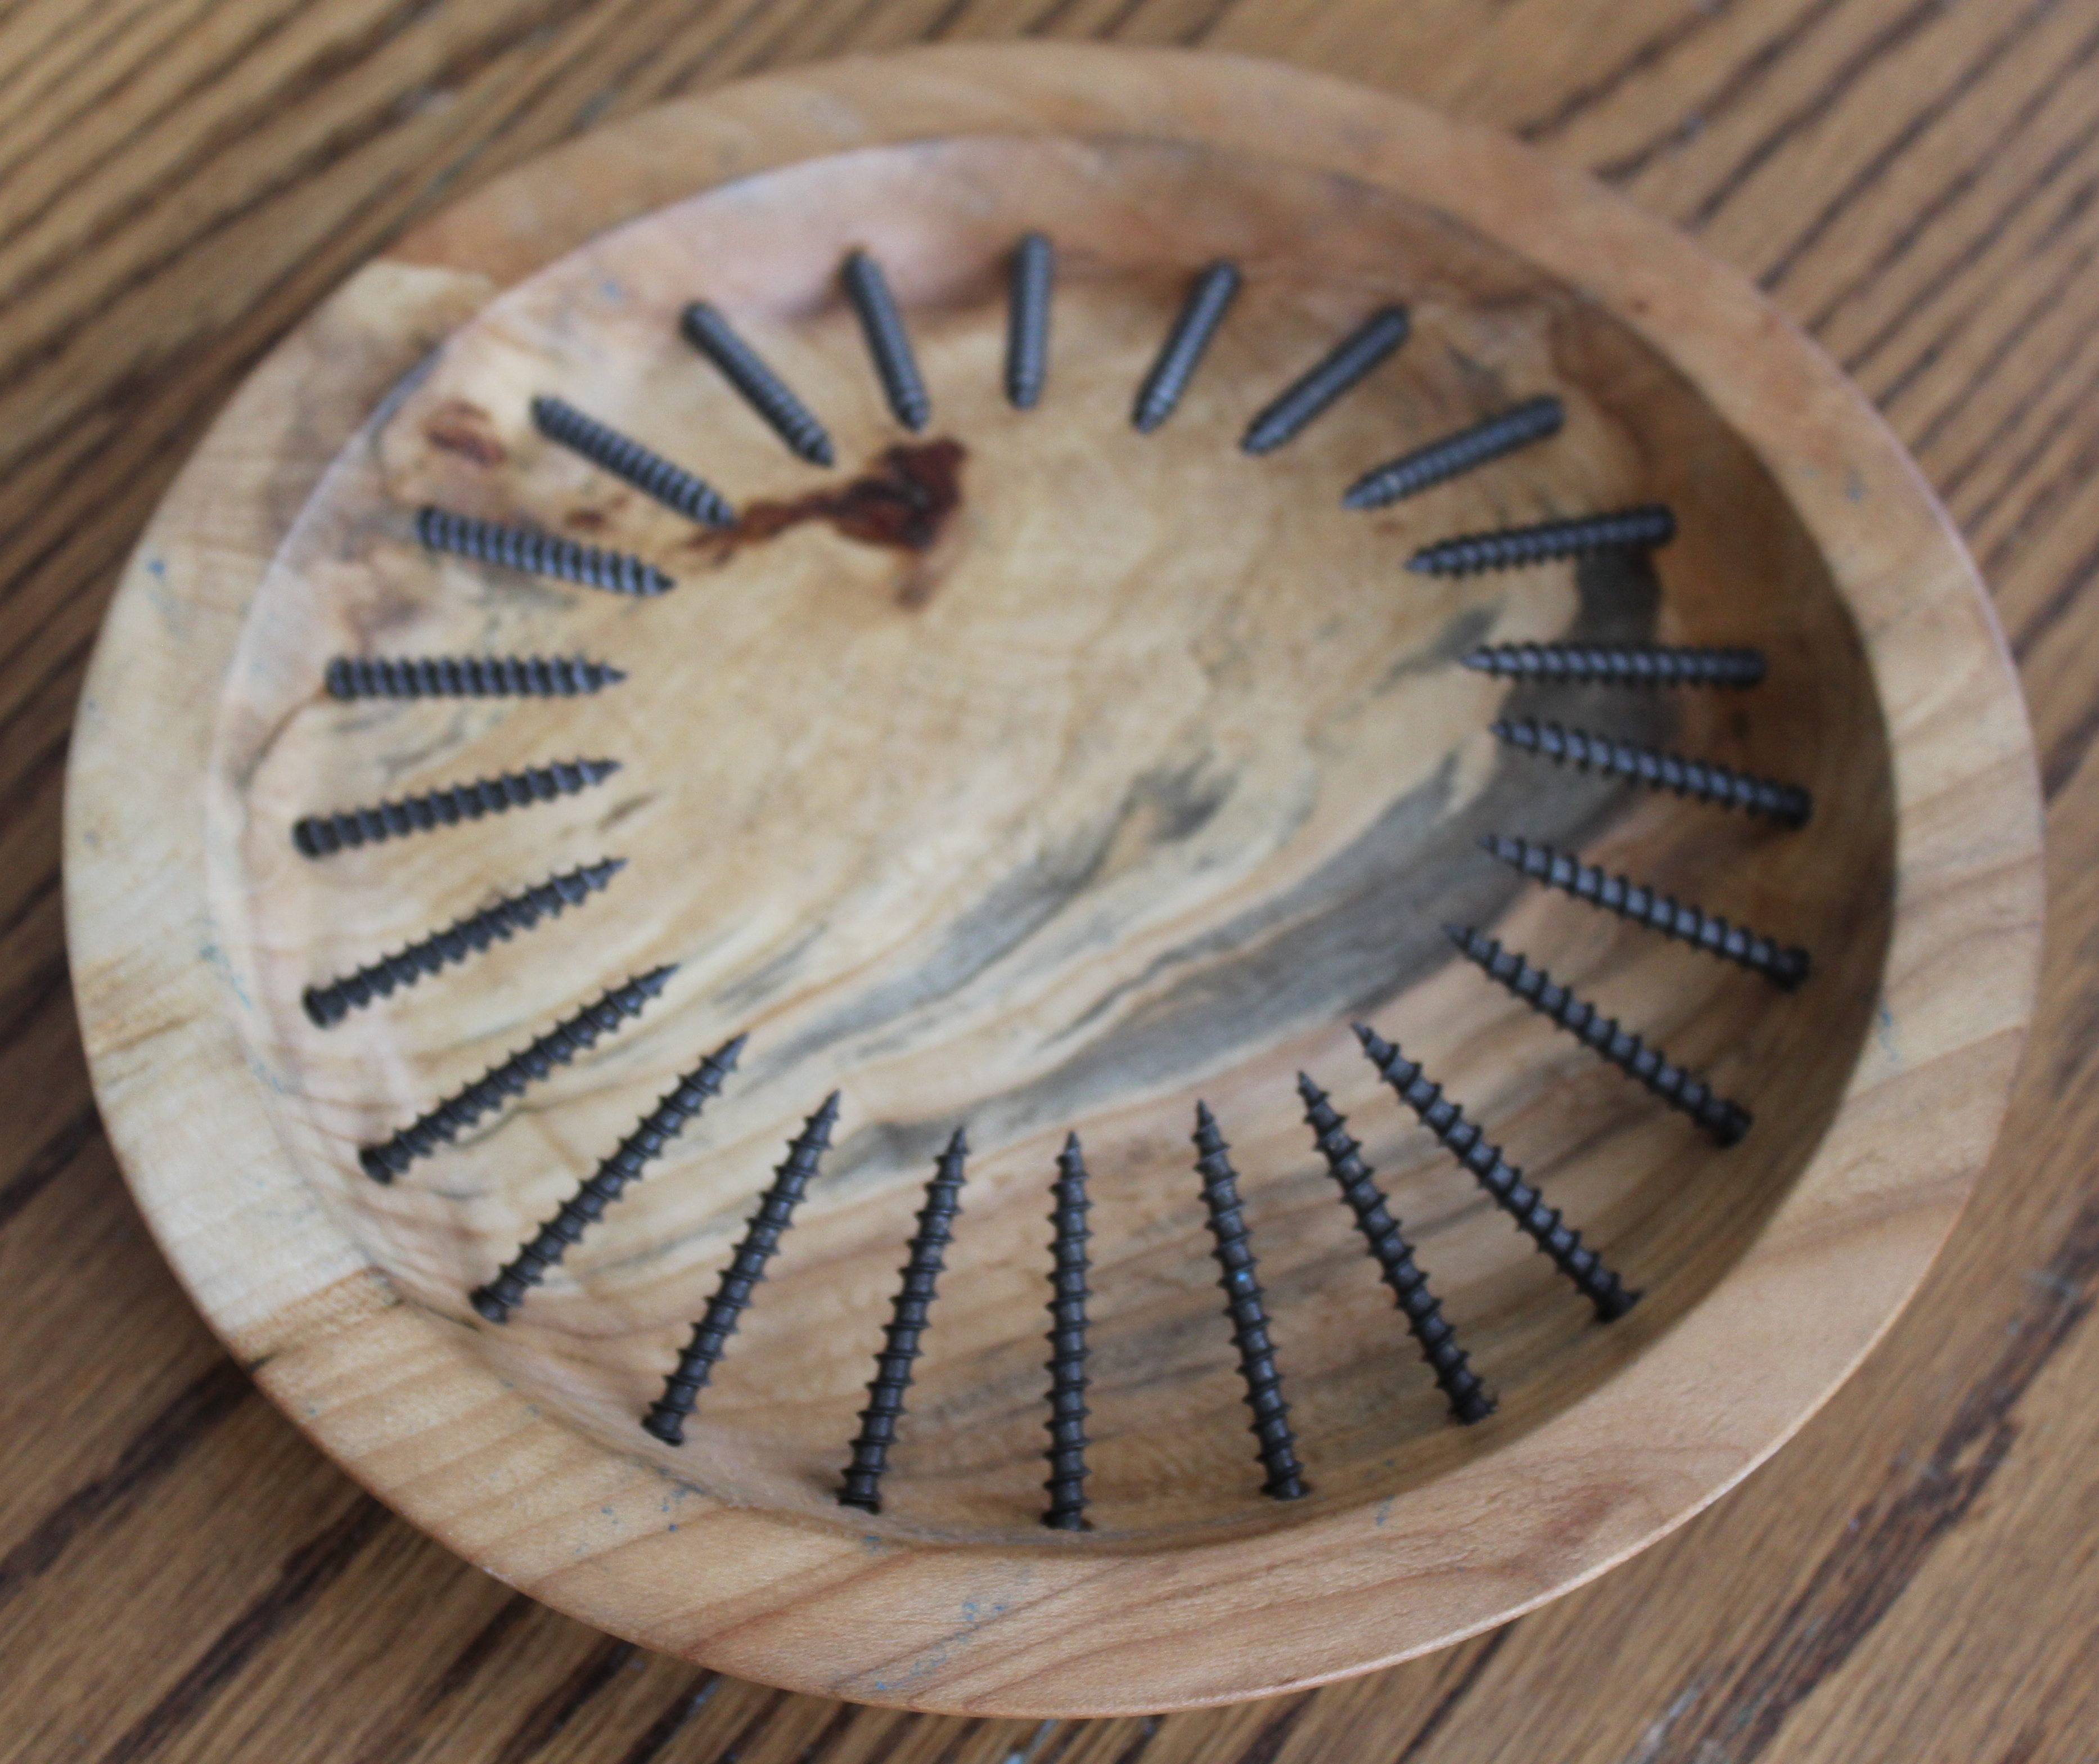
My woodturning club’s “president’s challenge” for May and June is to make something that uses screws, nails, or tacks. That’s a pretty wide range of possibilities, but I was having trouble trying to figure out something I could do that would be different. When I went into work last Monday, things got real clear, real quick.
Usually, when I finish making a bowl that I like, I take it to work and use it as a candy bowl, bringing the previous bowl back home to put in the box. I’ve been doing that for the last 5 years and it’s become kinda like a hummingbird feeder to the people I work with. They know that new projects typically come in on Mondays, so at some point, people will wander by for the candy, then admire the bowl. Now days, since I’m packing up all of my personal belongings to bring home, I let the current candy bowl run out then brought it home. The day after it was gone, five different people stopped into my office to take a piece of candy, only to find there wasn’t any. Four of them (realizing that my days working for the company are numbered) wished me well and either left or asked if I was giving the bowl away. The last guy – who I didn’t even know – asked when I would be bringing in a replacement bowl. Then he went on to tell me that he relied on the peppermints and root beer barrels in my bowl to make his breath pleasant before going into meetings. The sense of entitlement that was wafting off of him really was hard to ignore. I smiled and wished him a good day.
This last weekend, I made “the candy bowl from hell” with this fool in mind. Not sure if I’ll bring it into work or not (could be a little passive aggressive) but I’d really like to see him go fishing for a mint when it could cost him a little skin!
This might act as a slight deterrent to the candy grabbers, at least stop them from taking the candy by the handful!
Funny thing about having kids. When they’re in their “rebellious” teen years, they can’t seem to wait to get out of the house and into their own space. That happens, just like the move into adulthood says it’s supposed to. The funny part is that although they leave, somehow their stuff seems to linger. Then, as they mature and realize that they have stuff they want, but don’t want to cram it into their apartments, not only does their remaining stuff not leave the house, more stuff seems to come back. “Can you hold on to this for me, Dad, I don’t have the room”, “I figured I’d just leave this here for awhile…”, and “I’ll take that back with me next time” become phrases that just make me smile because I know it’ll be months (if ever) before it’s re-patriated with it’s rightful owner.
Then, there’s the SPECIAL stuff! This is stuff that’s not really useable for anything, but there is some form of sentimental attachment that elevates it into a special retention category. When my third daughter got married, somehow several boxes of uber-precious wedding “stuff” got unloaded into my garage. It wasn’t special enough to be taken to her house, but it was certainly too special to be thrown away. It’s like purgatory for material goods. One of those boxes was about 300 cinnamon scented pine cones that had been used for name place holders and decorations at the reception. First the box of pinecones were just sitting there, waiting to be taken. Then it got stacked with the others, so the boxes wouldn’t get lonely while they awaited their shuttle. Then it got shuffled to a shelf to make room for another daughter’s “stuff”. The pinecones were like a homeless person that never strayed from a two block radius. When I finally got my daughter to admit that she had absolutely no use for them, then became free game to be either thrown away or repurposed.
Some of them I packed into a smaller box and kept, because I’ve learned that at some point (most likely around Christmas) there will be a call with the “do you still have all those pine cones? I have a project I want to do…” request. Some I threw away, but some I took to see if I could make a bowl out of them. I figured I would give her the bowl to my daughter, if only to soften the blow of her discovering that I threw the rest of them away.
Below is the final effort. I like the effect, but I don’t think I did the pour right when I added the resin and there are way too many air bubbles in the resin, even though I put it in the pressure pot. Pinecones trap air. Lesson learned.
Top view. Between the pine cones are “leaves” from the cones that I added for texture and depth. As the centers of the pine cones were turned away, they form stars.Side view, where you can see the resin that goes from pearlescent red to clear
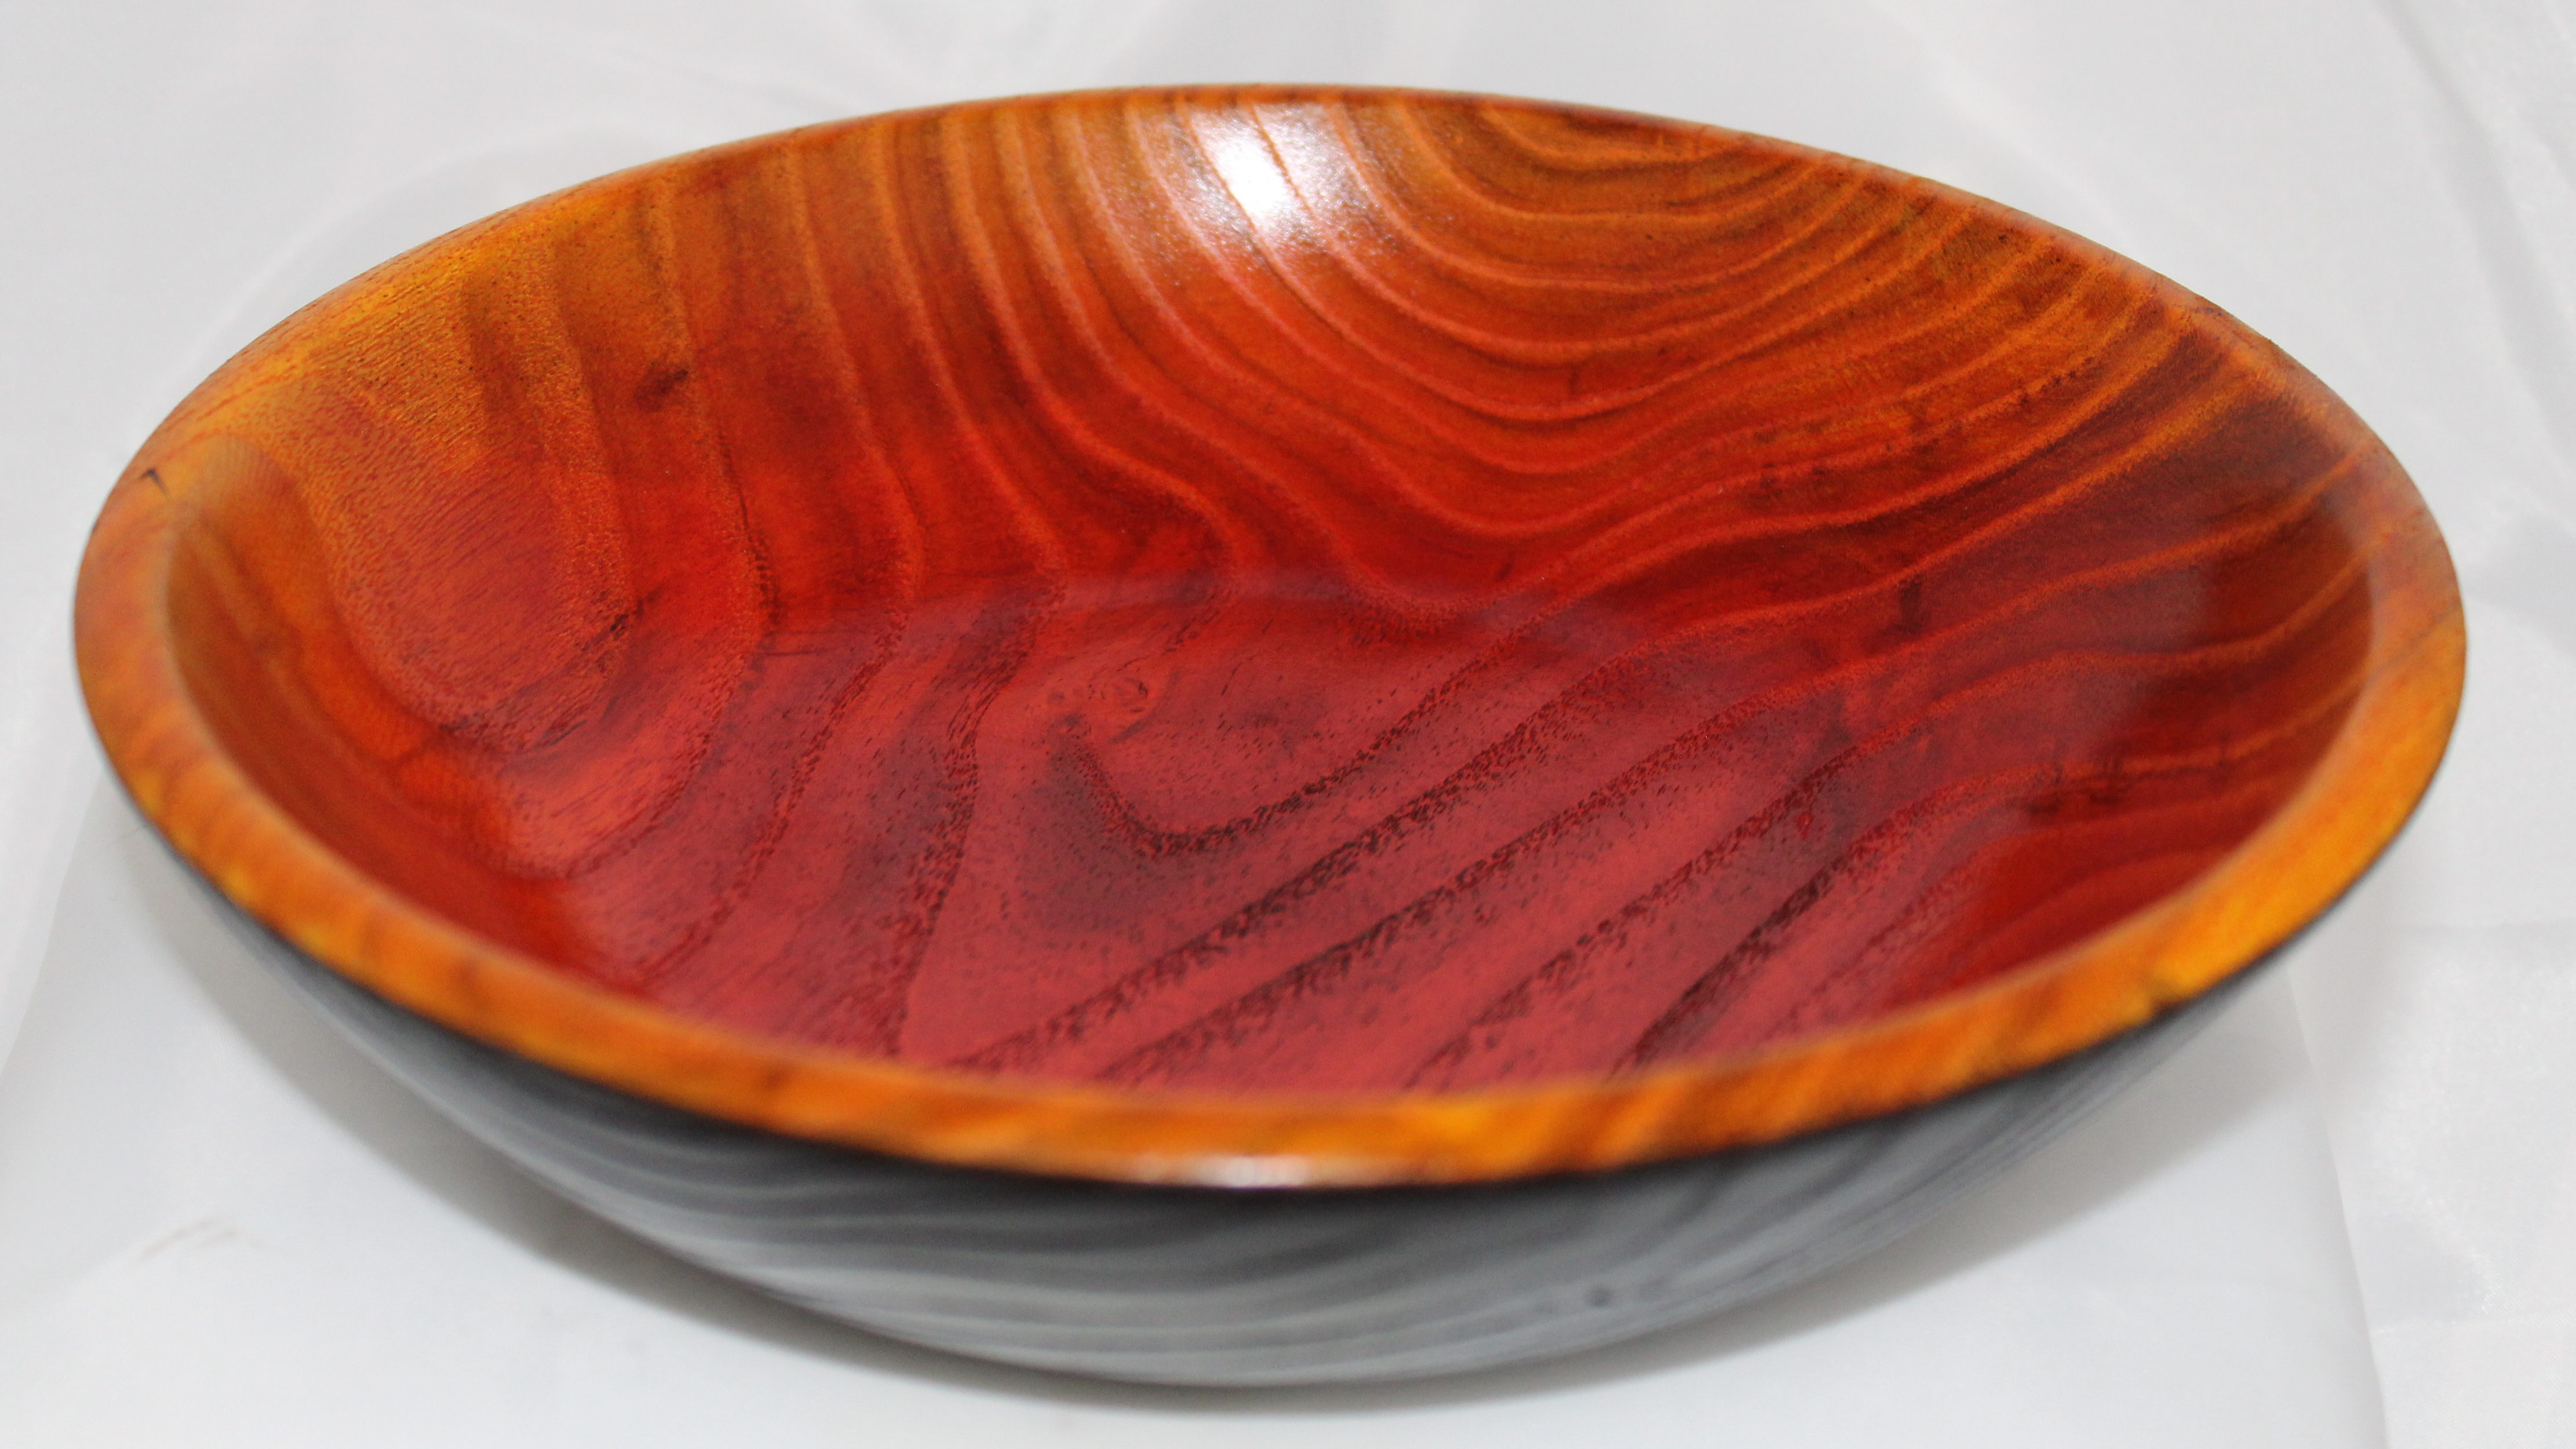
I found a piece of ash that I had started at some point, but stopped for reasons I can’t remember. The final shape was done, but it looked like I had only finished the initial sanding. Looking at the piece, I remembered that I had something very specific in mind, but for the life I me, I couldn’t remember what my initial intent had been. I decided to chuck it back up, complete the rest of the sanding, and hopefully I’d be able to remember what I was thinking. When I was finished sanding, I looked at the grain pattern and remembered that I had intended to use a blowtorch on it to accentuate the grain. that would also explain why I hadn’t finished sanding, thinking I would do that after the torch work was done.
The new idea was to get some practice with the airbrush and see if I could do a little better blending the colors. Rather than try to blend three colors into a gradient, I settled on two and did a pretty good job of making the orange blend into the yellow. To make the colors more striking, I decided to paint the outside black. For a practice piece, this turned out pretty good!
in person, there is a much more gradual change from the dark orange in the middle to the yellow at the top. The top is actually bright yellow.
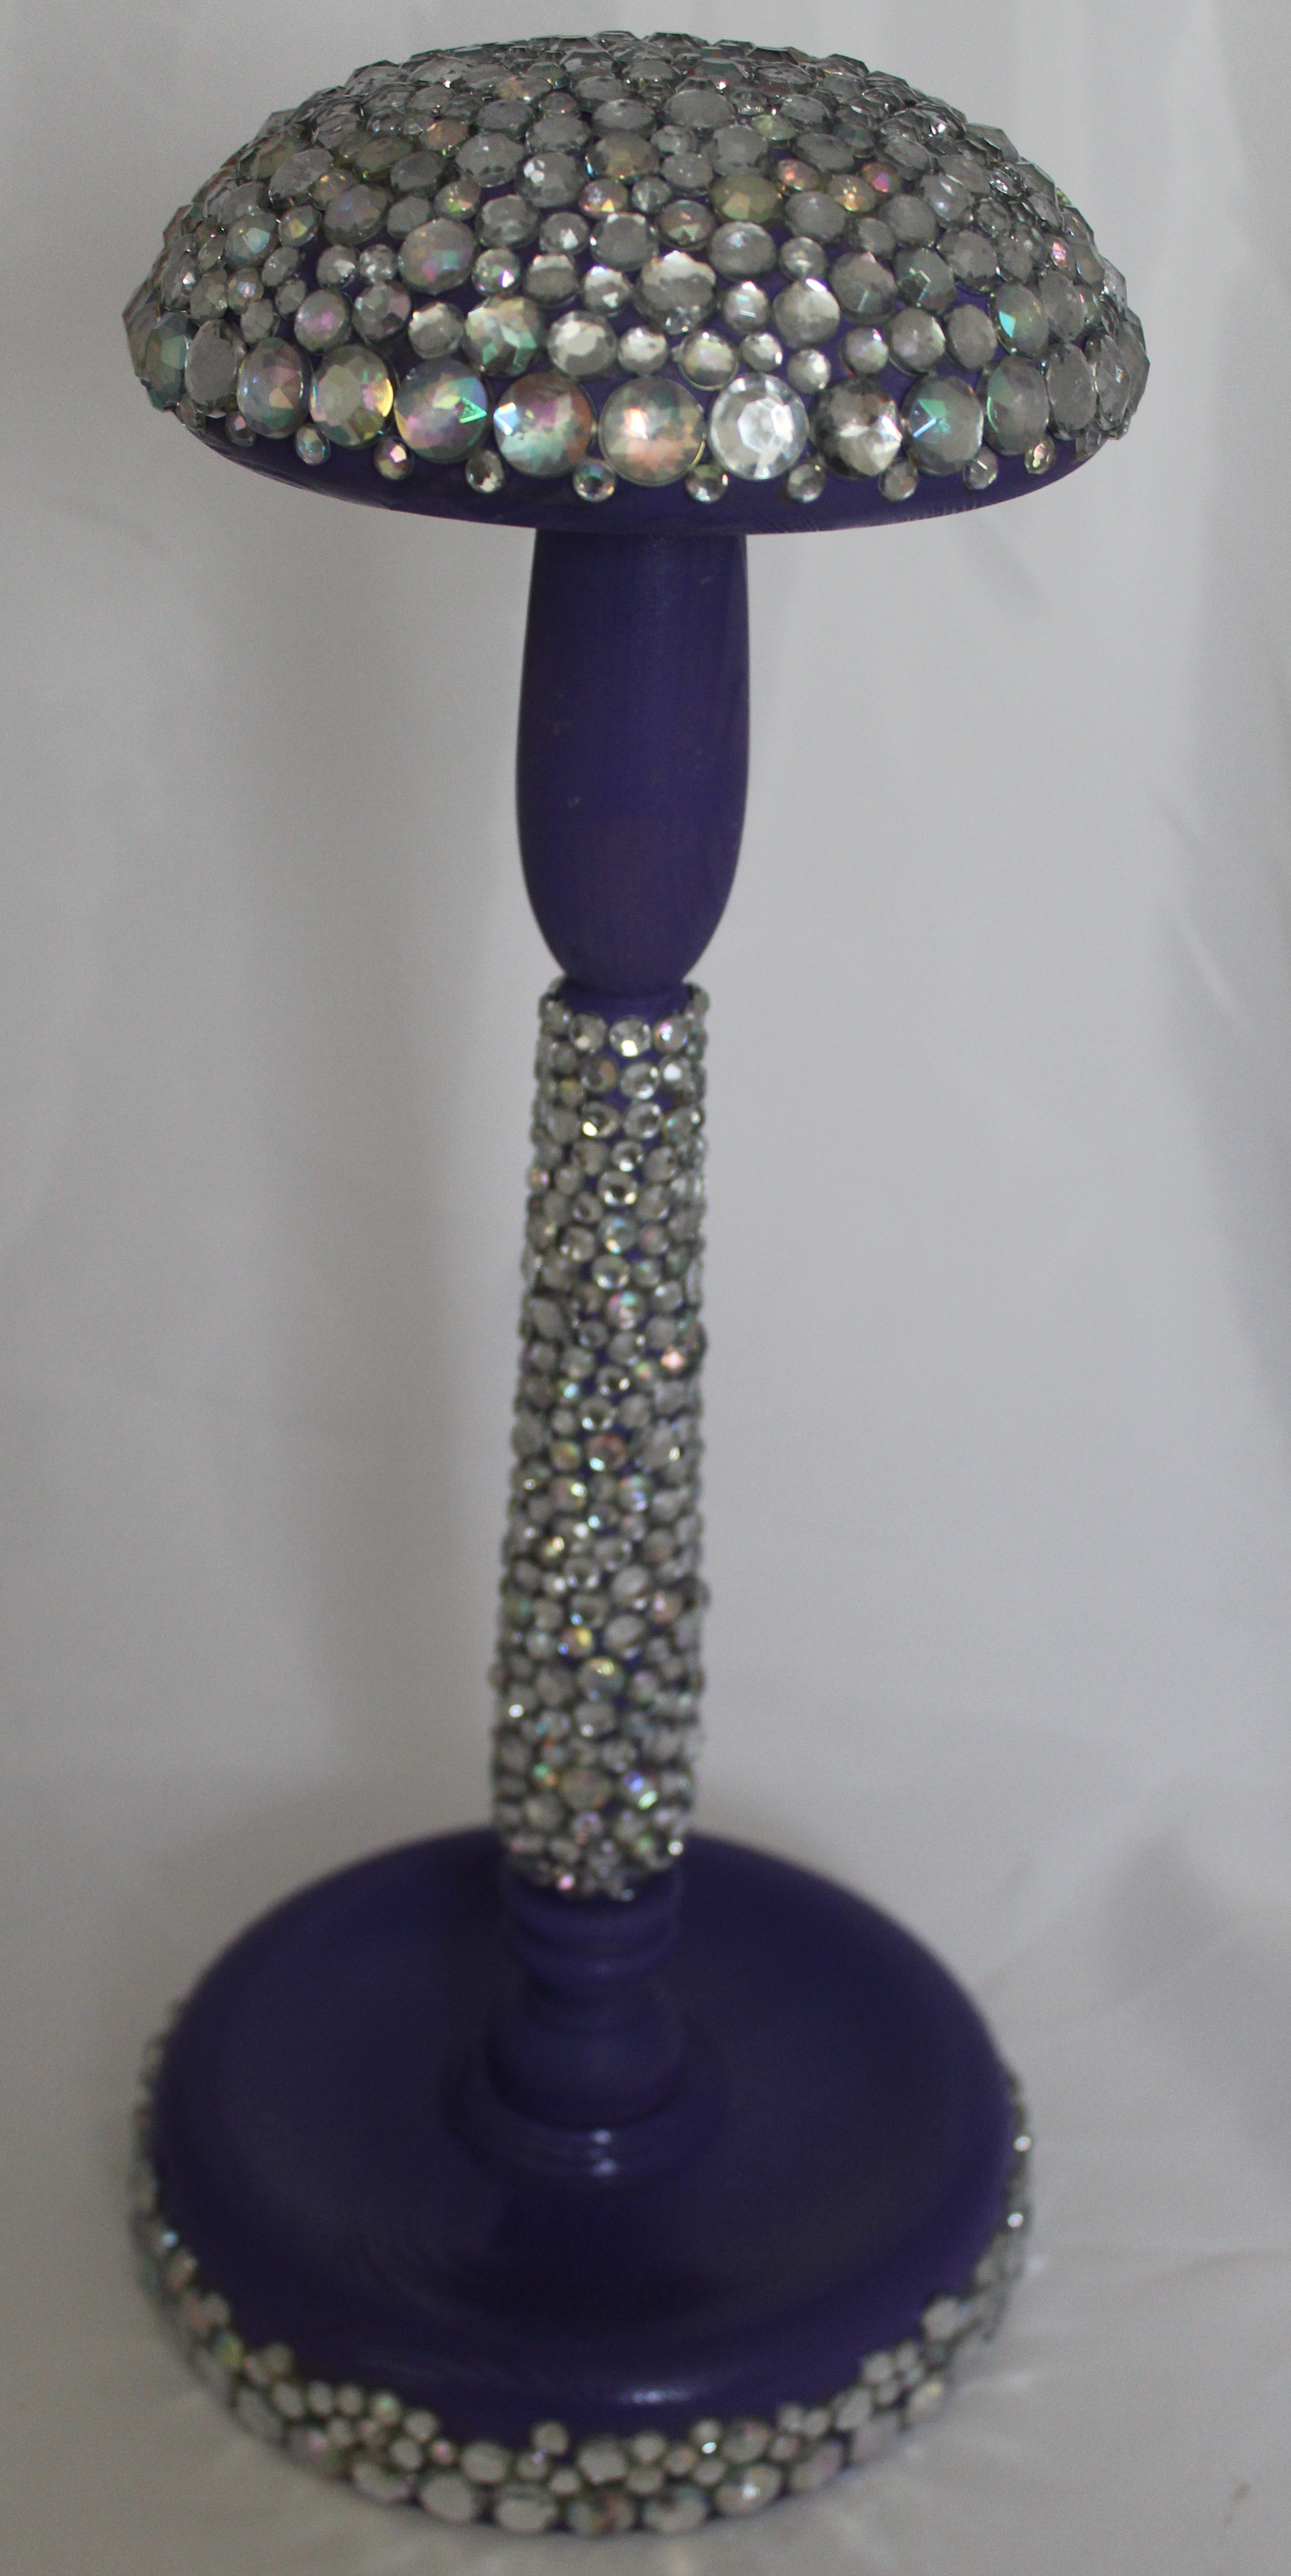
So I’m trying to finish up some projects that have been laying around, just to reduce the amount of “stuff” I have in the shop. This includes turning up the wig stand kits that are still there waiting. Two more done, ready for delivery:
For this one, if Liberace (anyone under 50 may need to google him to understand) ever needed a wig stand, this one would certainly be in the running. After having to glue every one of those rhinestones on individually, it is not likely to EVER do another one of these!
Well… This is sparkly!
For this one, a guy at the club made up a kit just for me, made from birch plywood, since he liked the bowls I had made using that material. When it got done, it didn’t look all that different than the one he had made, so I figured I’d add a little color. When I got finished, I figure if Joseph ever needed a wig stand to put next to his cost, this would be in the running. (For those not forced to attend Sunday School as a child, you might want to google that one, too.)
We Toons are a crafty bunch! It’s not uncommon to see three or four of us sitting around the kitchen table, each working on some project or another, listening to music, talking about anything and everything, and laughing at all of the passive aggressive savagery that makes up the typical banter. Their sense of humor, especially when they can feed off of each other, is a great way to spend an evening.
When the woodturning club started making wig stands, the girls all wanted to help. Megan was first with a wigstand that received a special thank you note back from the woman who received it. Then Alexa made one that got oohs and aahs from the club. Megan went again with another using a wood burner that impressed even the most seasoned members. Jenny offered one using recycled maps that the club thought was very creative.
Now Courtney’s jumped into the fray with the effort below. While I’m sure there’s some part of Courtney (and all of them for that matter) that wants to help cancer patients, I’m convinced the other 99.9% is looking to outdo her sisters! When she told me what she had in mind to do to the wigstand, I smiled and said, “that’ll be kinda cool”, but inside I didn’t think there was any way she could pull it off. When she asked if she could borrow my foredom, I said yes, but thought, “she’s never going to be able to control that kind of power carving tool”. When she showed me the final product, all I could do was look her in the eye and admit I was wrong. This one’s really good, from the concept to the execution.
The intent is to make this look like a geode, which I think she’s done quite well!This is the under side of the top. WAY cool!
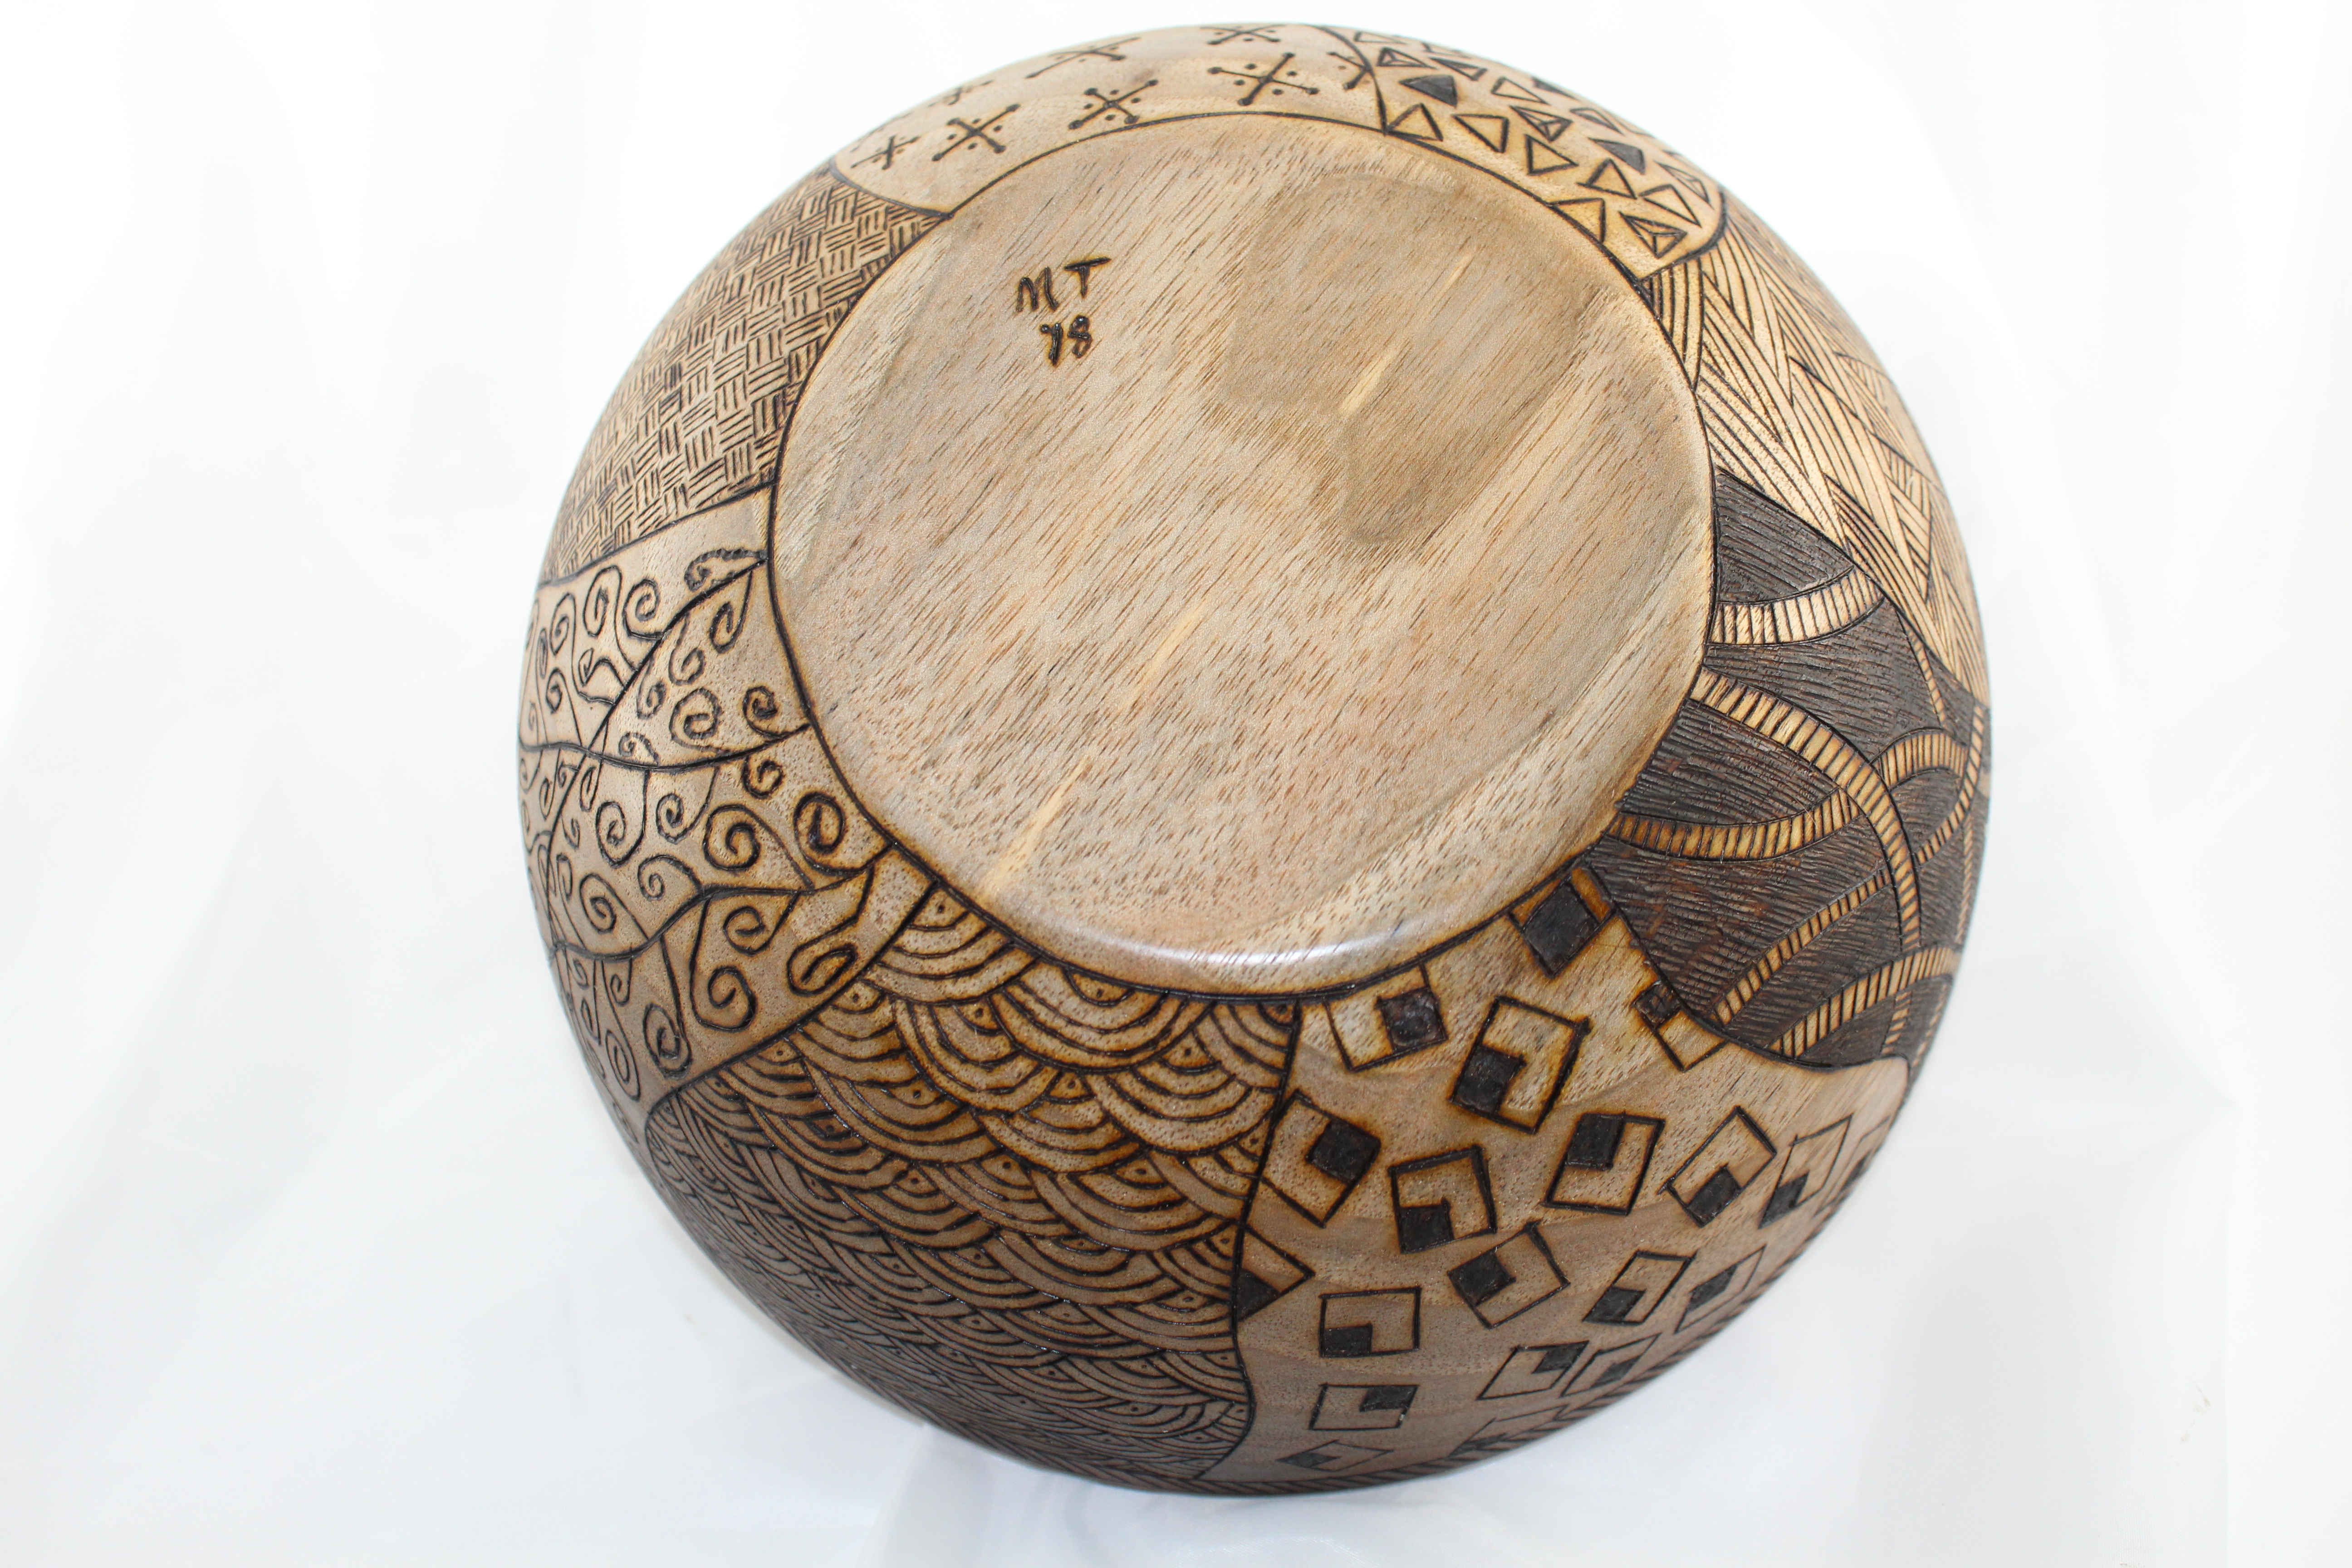
I’m trying to work through some old rough-outs that have been sitting around for awhile, drying. The thing about rough-outs is you never know what you’re going to get when they’re dry enough to turn. (Kinda like a box of chocolates, only with more testosterone and power tools.) Sometimes, everything turns out great! Those are the blanks you hope for. The bad ones break down into specific categories:
Warping – Often, the wood will warp from round to oval, so by the time you turn off the points on the ovals to make it round again, all you’re left with is a saucer sized dish.
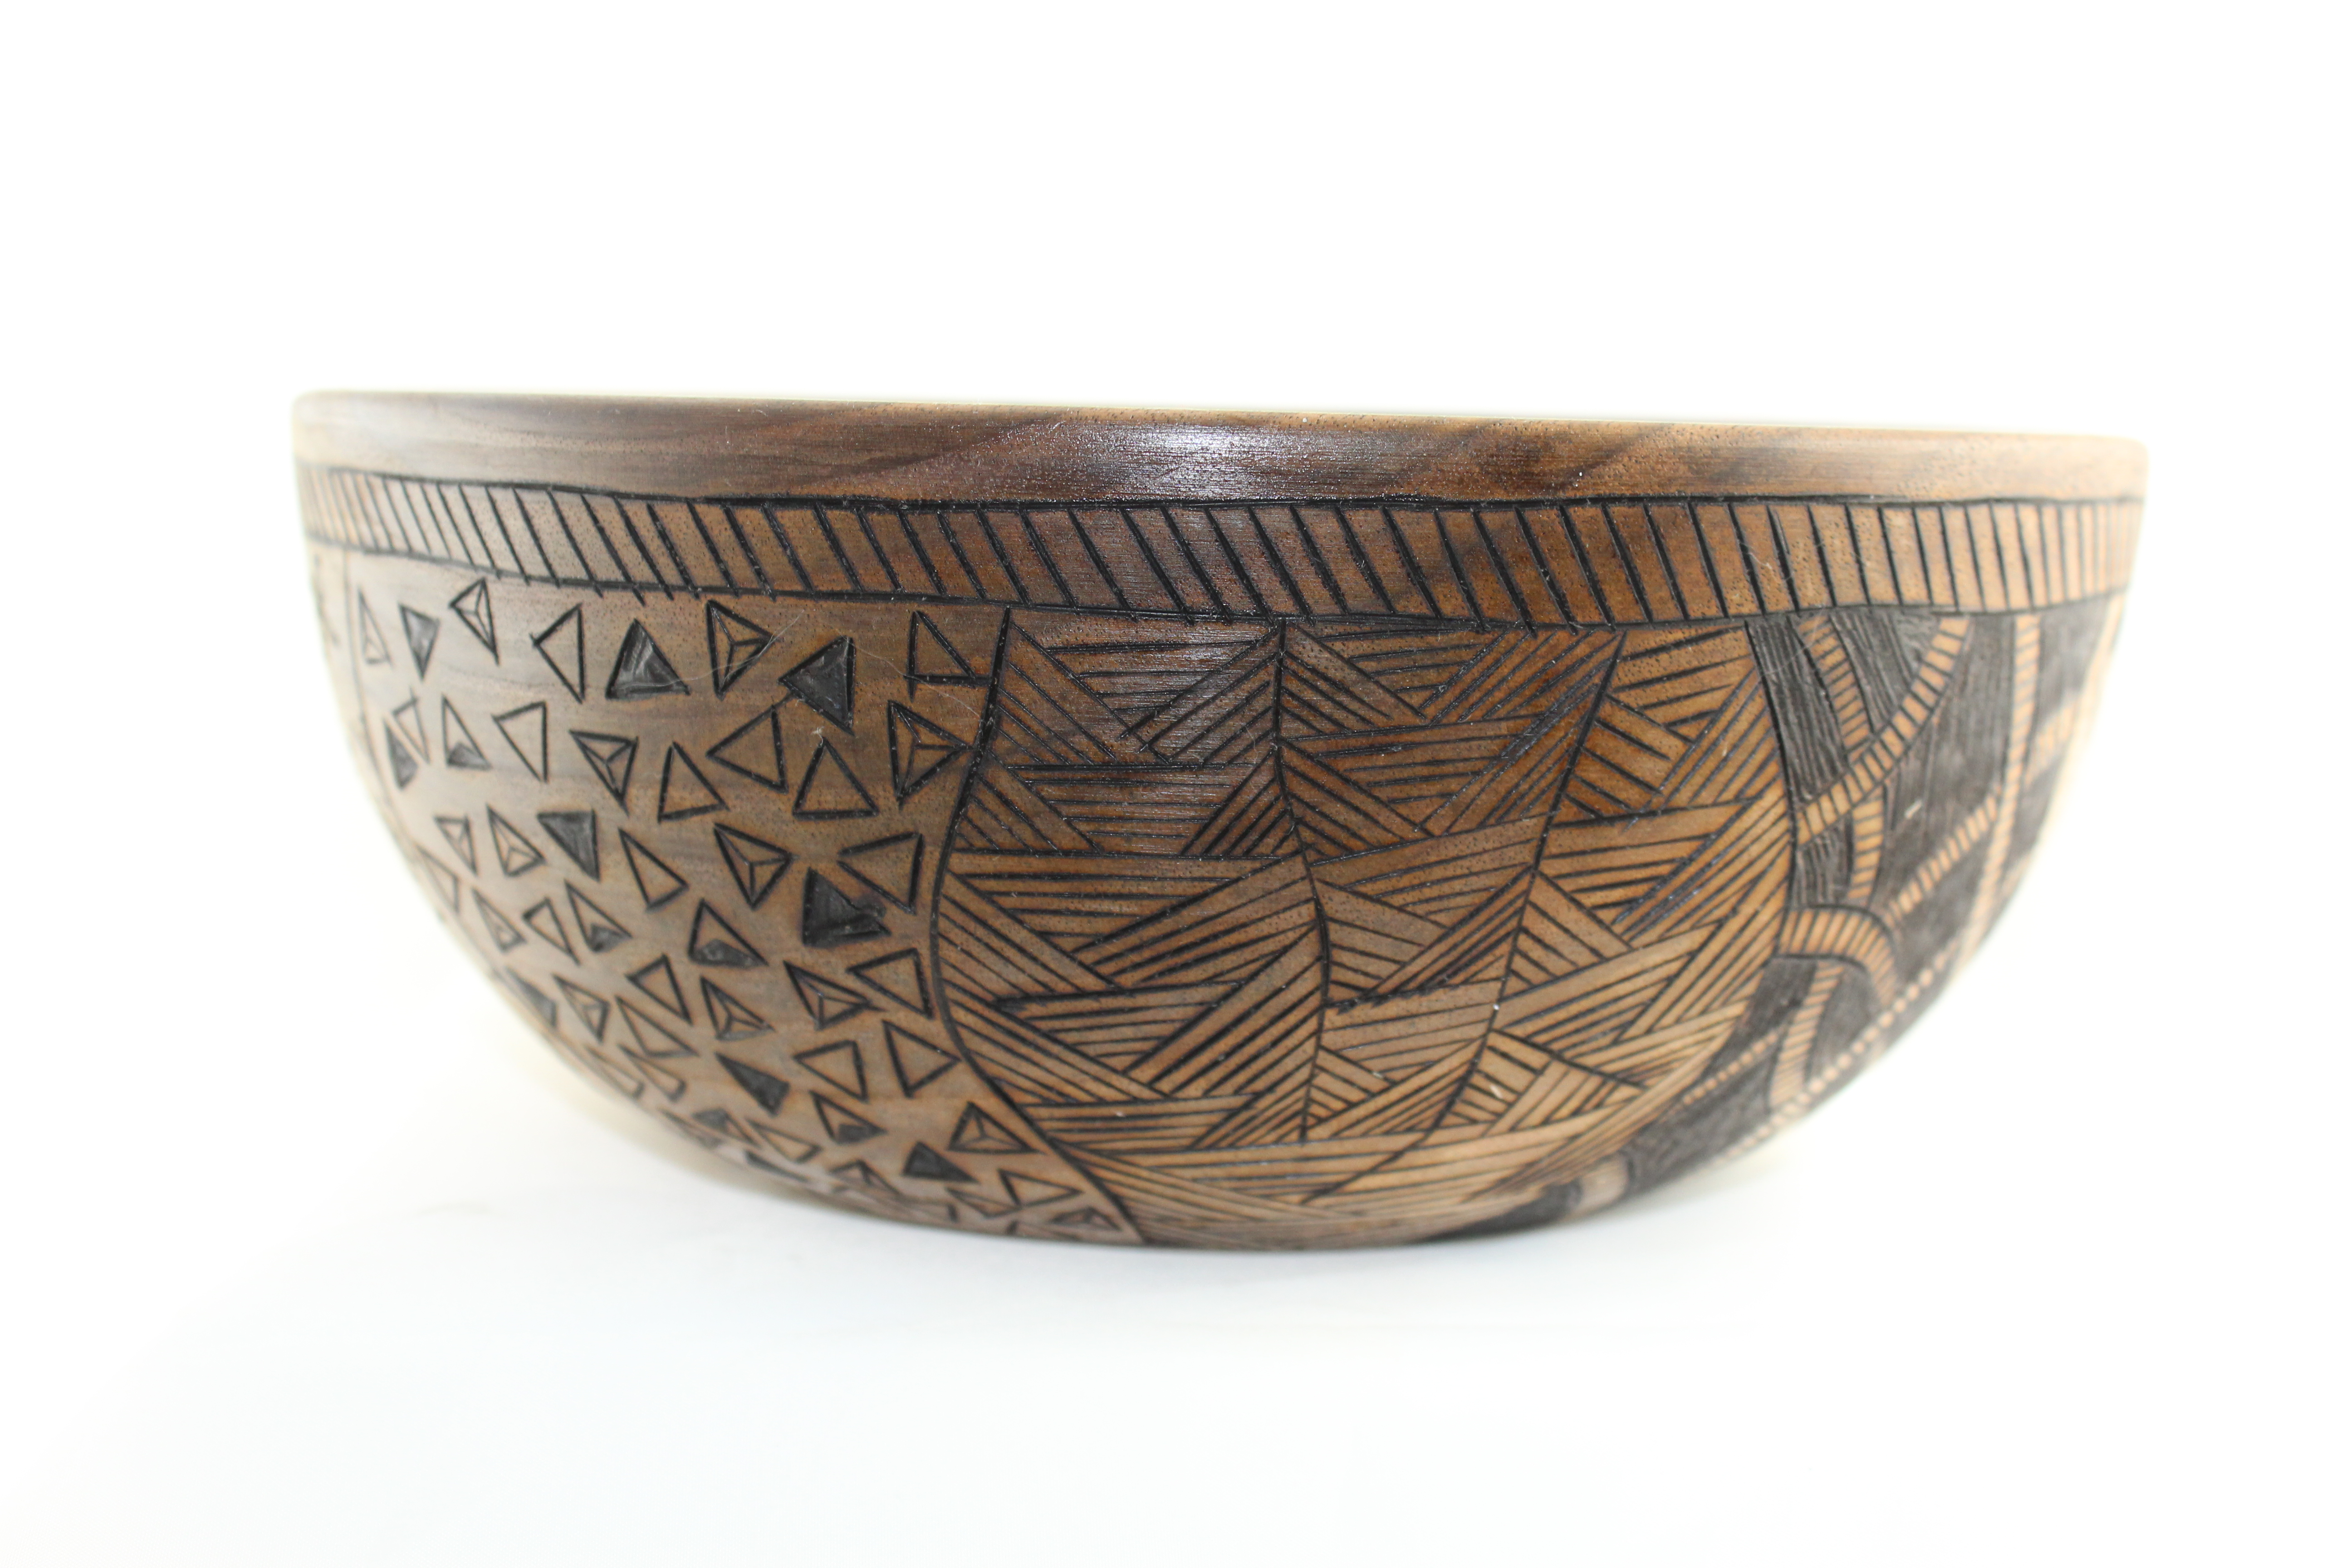
From the top, this looks like any other walnut bowl and no one would know the warping made it about two inches shorter than it used to be.From the side, the wood burning effects stand out against the darker walnut wood.From the bottom, all the zentangle designs can be seen.
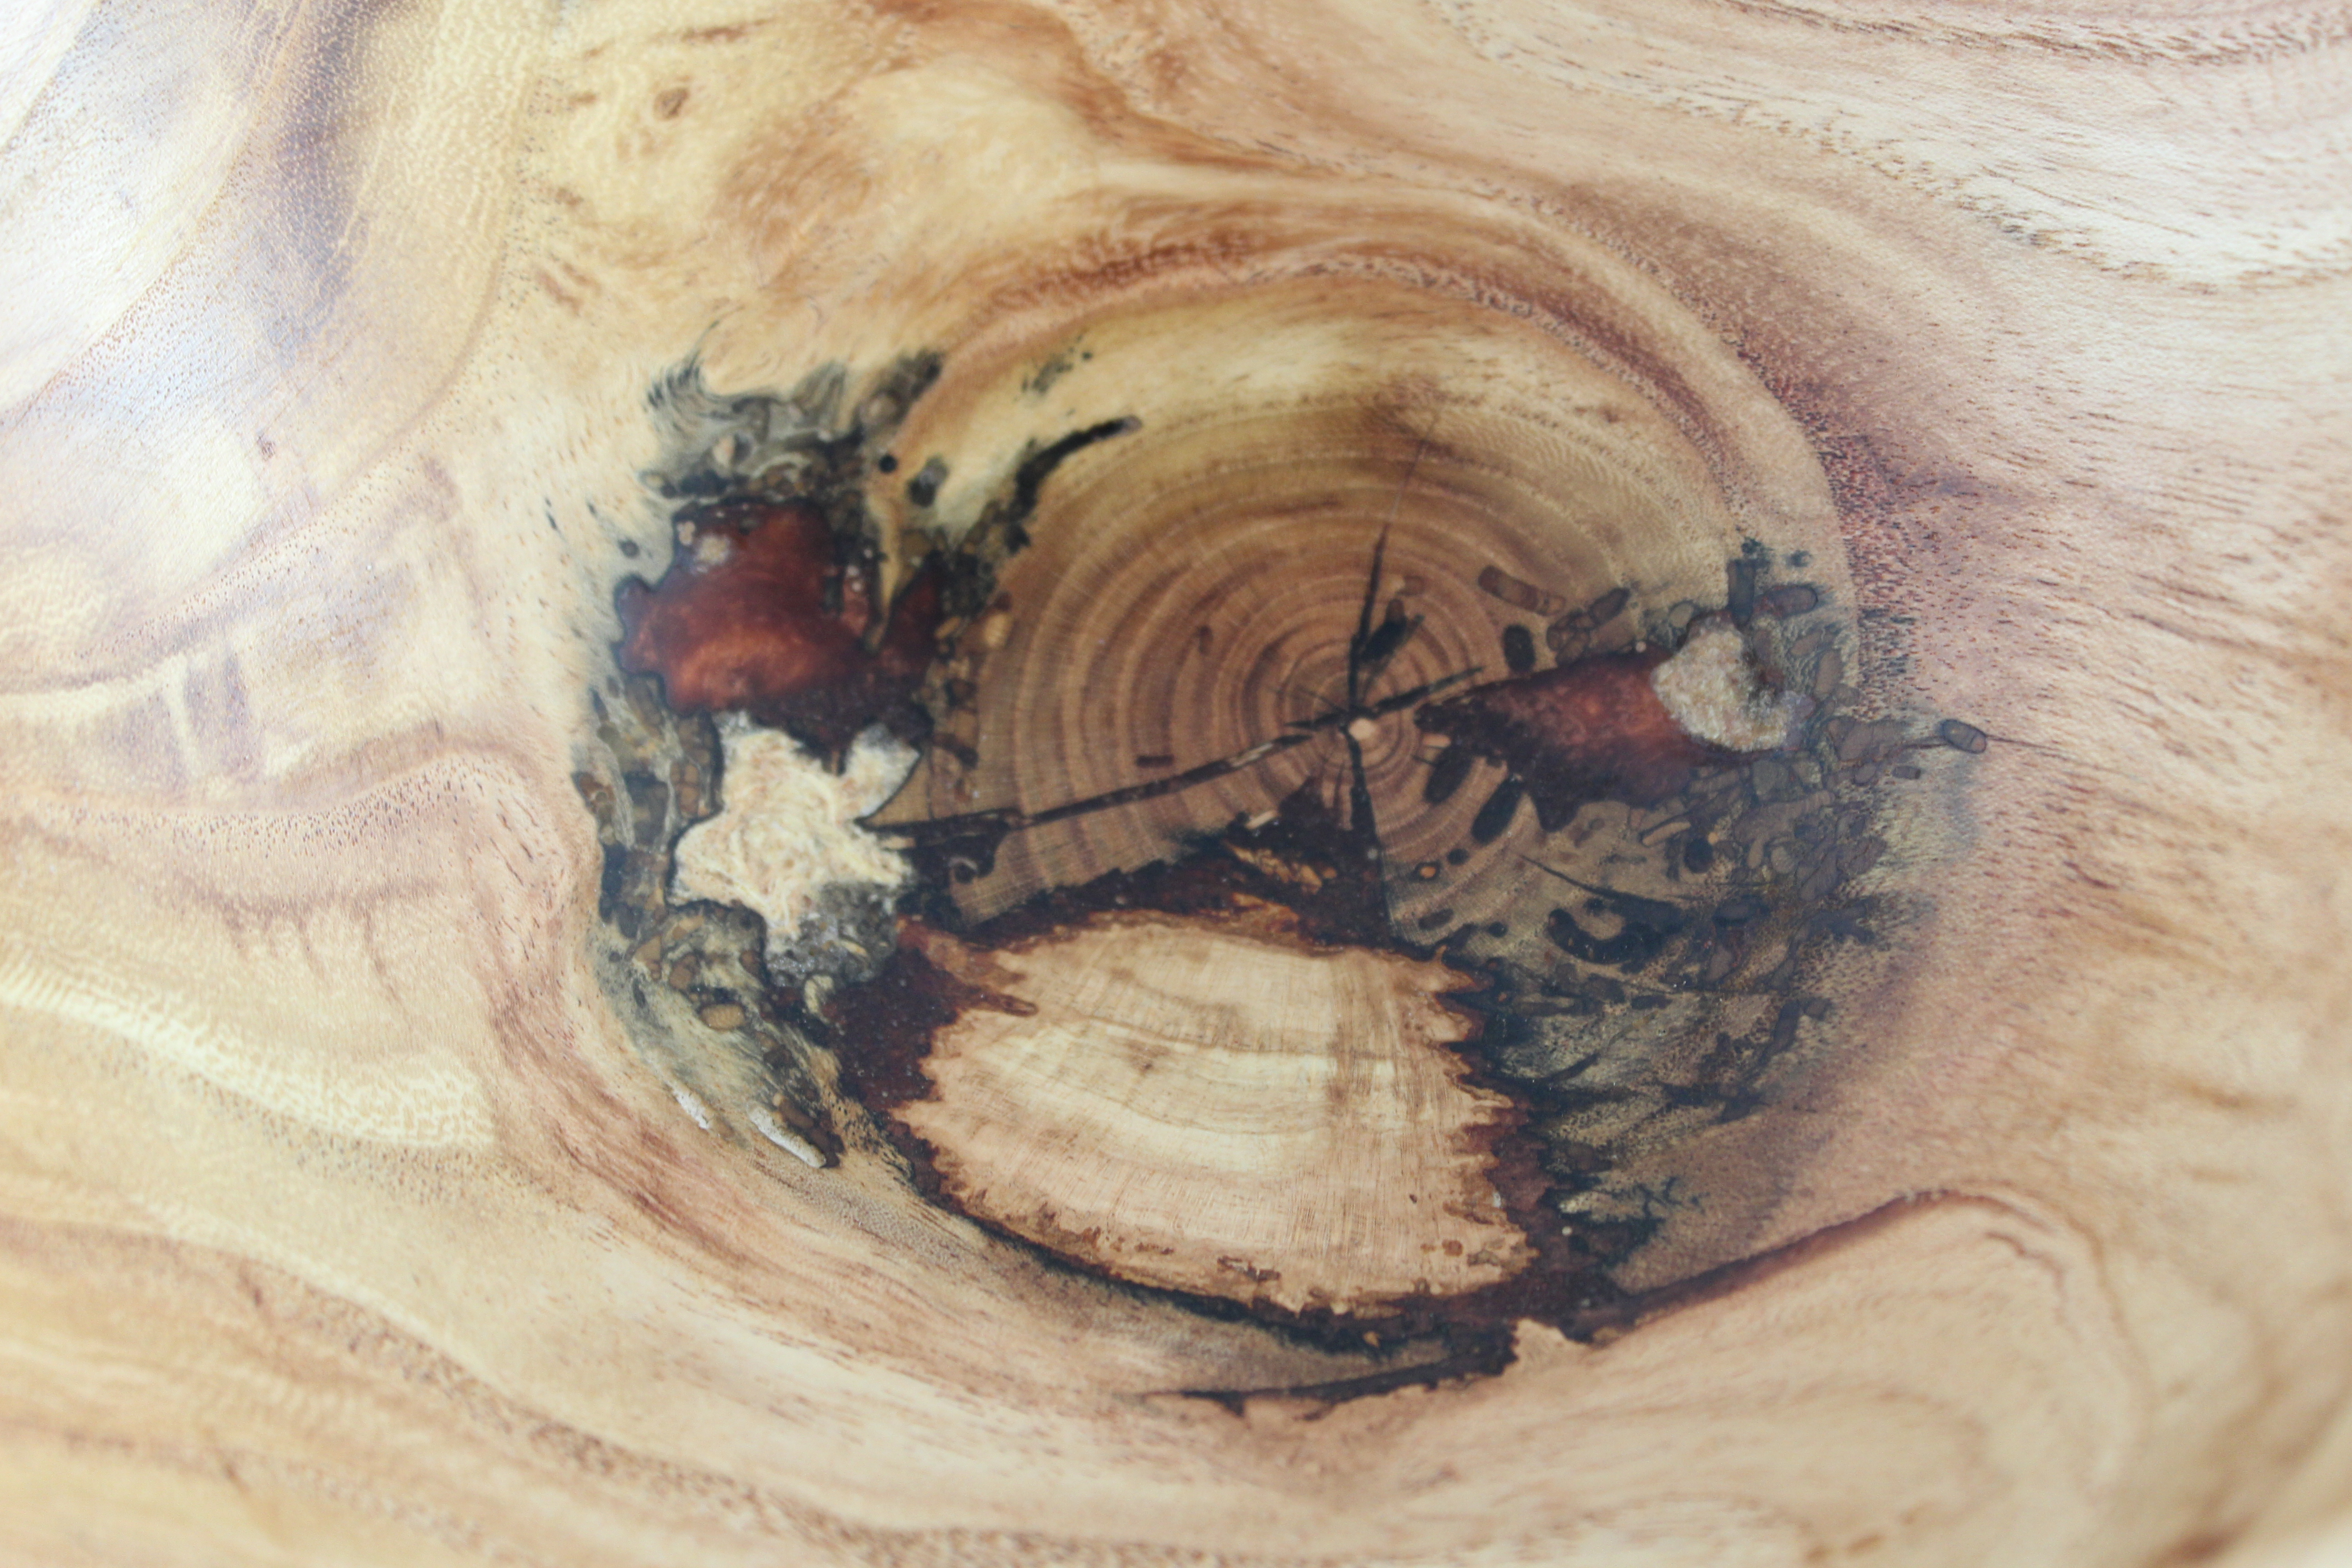
Cracking/Checking – If the moisture leaves the bowl too quickly, the fibers of the wood will separate to allow the wood to move. This causes cracks to form, and once one starts, it’s always a crap shoot to see how deep and how far it will spread. Sometimes, filling the cracks with some kind of epoxy or CA/sawdust mixture actually helps the piece and makes the turner look like an “artist”. If the cracks are too bad, the blank will becomes unstable and the blank will explode when the centrifugal force of the lathe kicks in. The only reason to try turning an unstable blank is to collect on life insurance.
This bowl has several large cracks running through the bottom that were filled with epoxy. It also had a large rotting spot where the knot is that was also filled with epoxy.Close up of the knot that was starting to break down. The star shaped piece of wood is all that remains from a punky piece of an old tree branch.
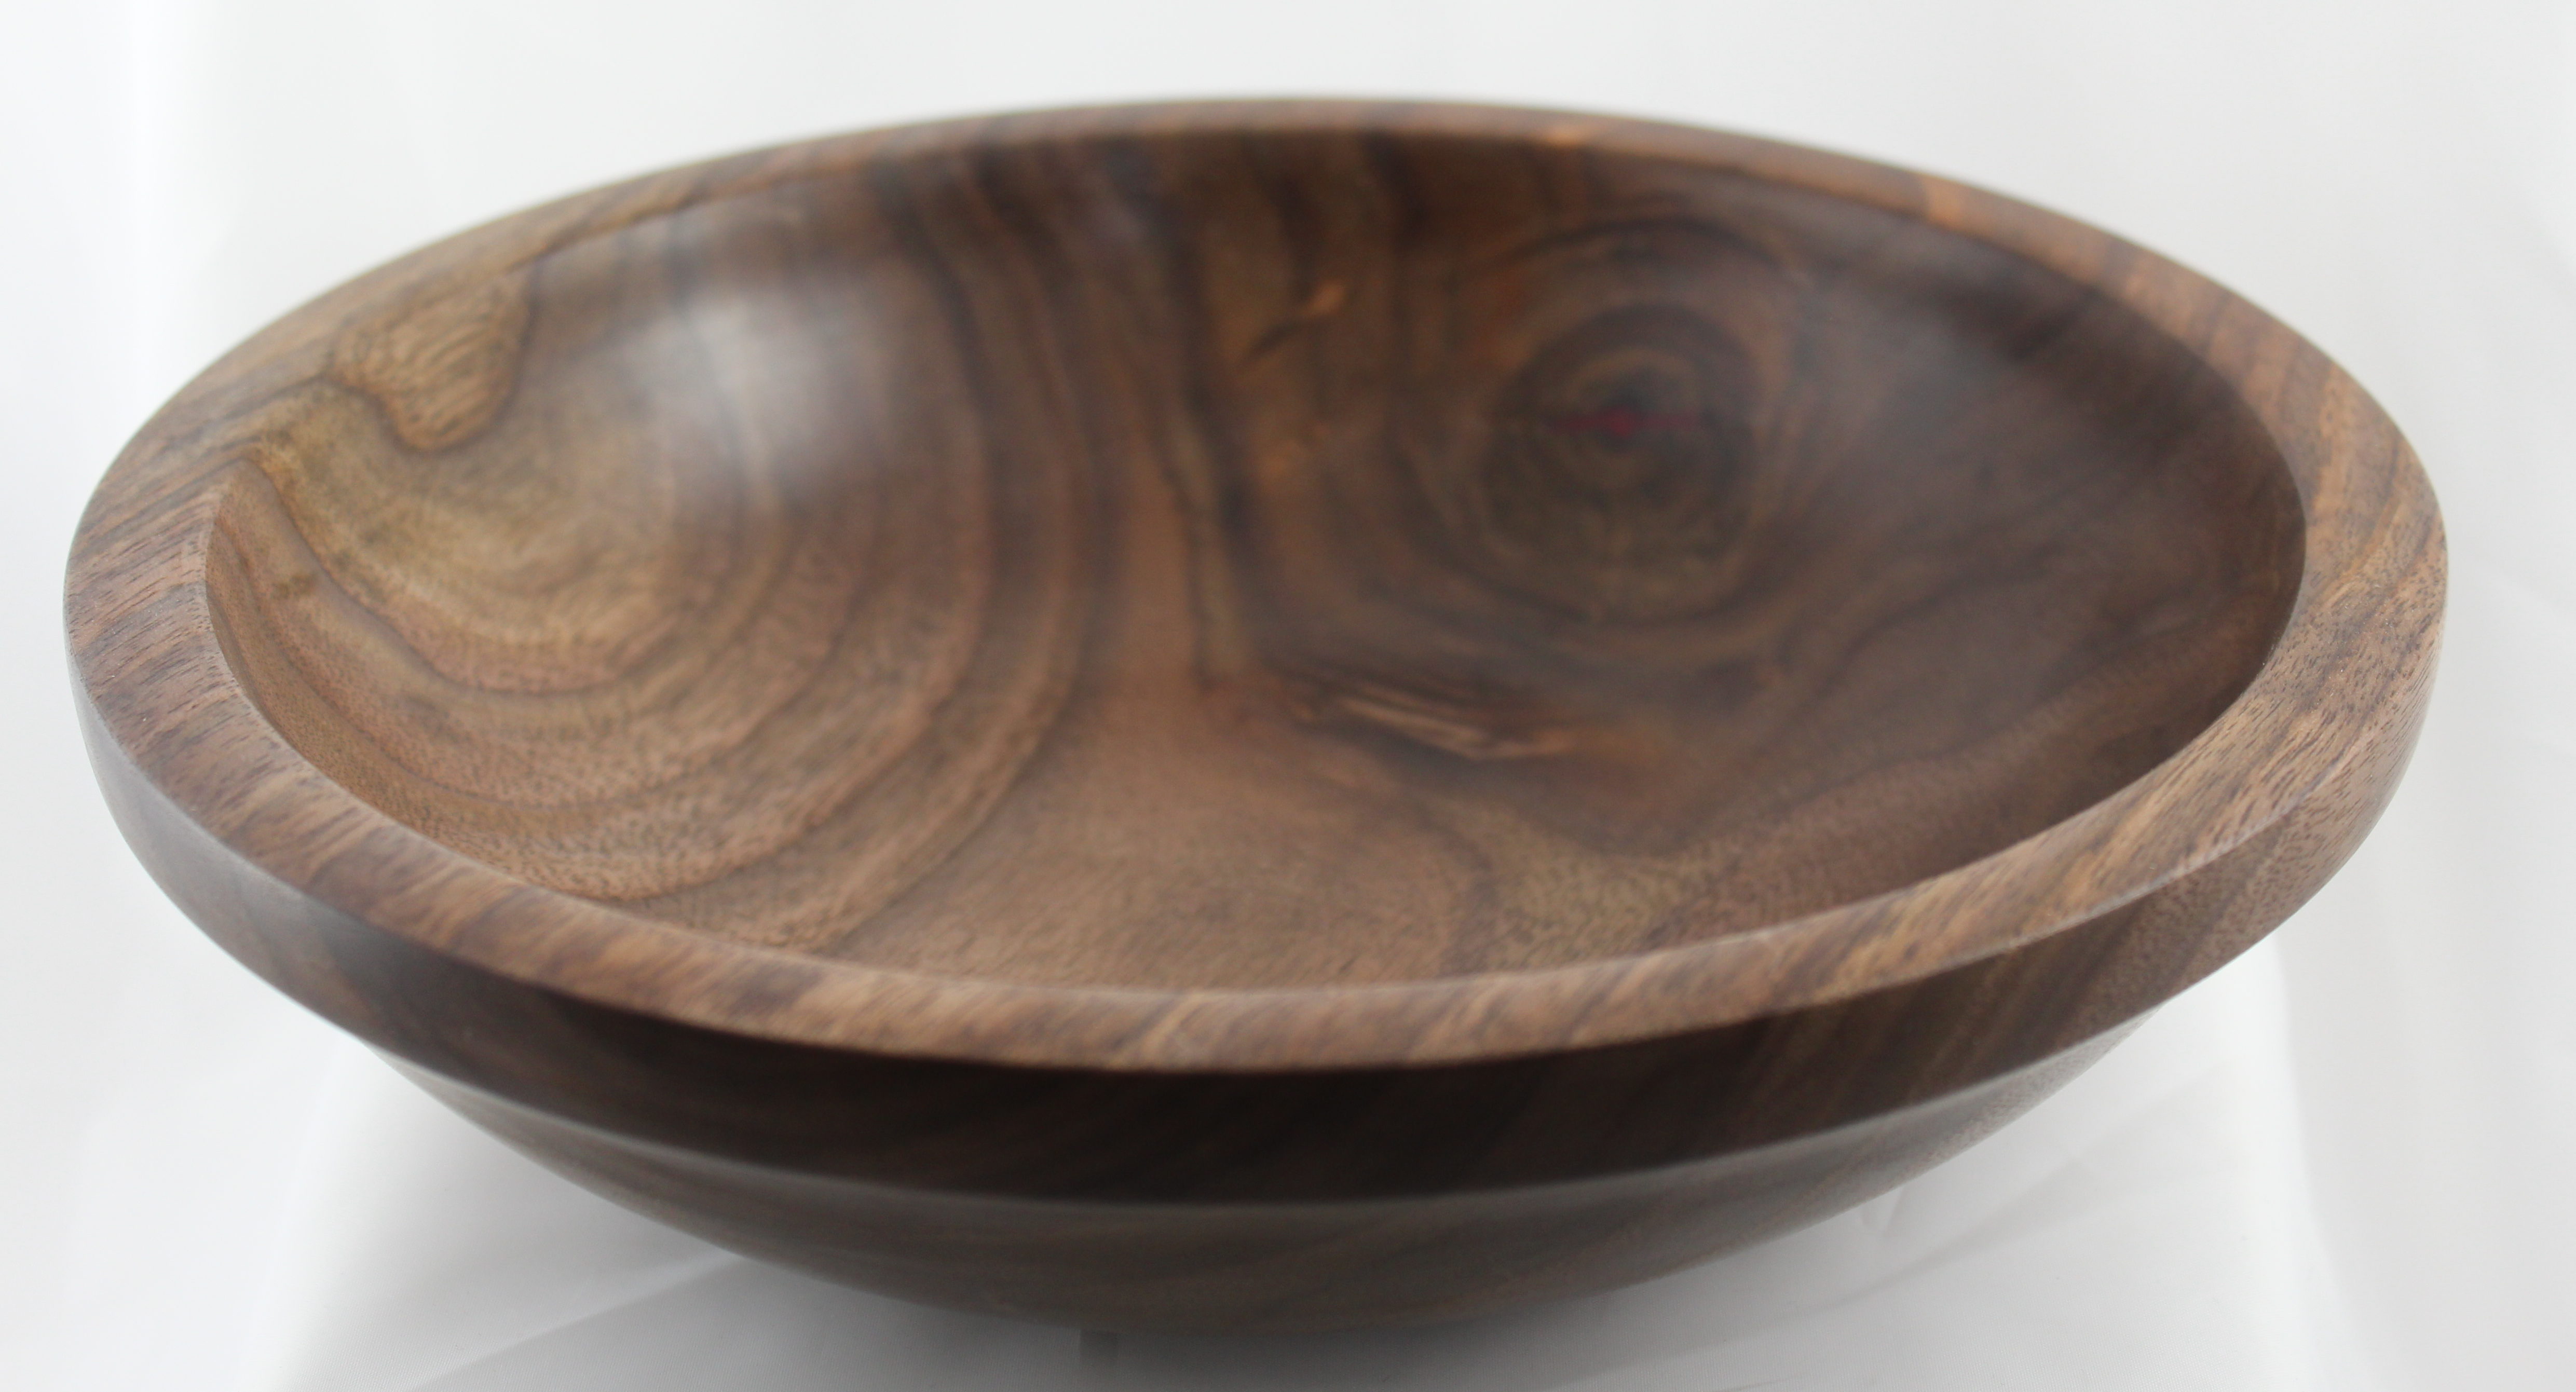
Knots – If there’s any kind of knot in the roughout, there’s a 99.99% chance that there’s going to be an impact. Either the knot itself will split apart and crack, the wood surrounding the knot will split apart and crack, or the knot will not move the same direction as the rest of the blank, leaving a hard, bumpy spot that is difficult to turn. I try to avoid blanks with knots!
The knot on the back side of this walnut bowl was split in about 5 pieces and had nearly dislodged itself from the rest of the bowl. Its not held in place with red epoxy to fill the gaps.
It just so happens the three bowls I finished fit into one of the three categories listed be